

Configuring antivirus and endpoint protection can get very complicated as there are a LOT of settings which can be enabled, these are split across different configuration areas, and they can be set it different ways.
Microsoft provides a Microsoft Security Baseline which can be enabled and applied straight out of the box. The list of options and the configuration is available here. If you are looking for a fast way to apply antivirus and endpoint protection you can simply apply these, however in this guide we will be configuring them manually, but may cover baselines in the future. As there are now five we can use (as shown in the image below) it may be interesting to apply them all and see how the endpoint performs. If you want to view them within Intune go to “Endpoint Security” > “Security Baselines”.

Another thing to remember is that antivirus, and endpoint security relate to very different settings within Intune, and that you will also need to configure Endpoint Detection and Response, and Endpoint Security settings even if you have configured antivirus settings.
First up as a minimum, Microsoft recommends the following security policies:
Install antivirus (AV) and regularly scan for malware
Use detection and response
Turn on the firewall
Install software updates regularly
Create a strong PIN/password policy
IMPORTANT NOTE.
Don’t deploy anything without testing first as you cannot easily roll back restrictive policies applied via Intune. For example, you apply a baseline to a device, but it causes issues so you need to roll back. You can’t simply remove that user or device from the policy to revert all the changes as described in these articles, cant-change-security-policies-for-enrolled-devices and i-changed-a-device-restriction-profile-but-the-changes-havent-taken-effect so make sure all profiles are tested individually to identify any potential issues before they are deployed to a live environment. I would recommend doing a test roll back to make sure you have a well tested back out plan.
For any of this to work, we need to enable the connection between Intune and MDE so we initially login at https://security.microsoft.com go to “Settings” > “Endpoints” > “Advanced Features”, and switch “Microsoft Intune Connection” to On.

Now Intune integration is enabled we need to make sure that it is communicating correctly, so we head over to Intune at https://endpoint.microsoft.com and from the home page we select “Endpoint Security” and ensure the Connection Status is “Available” as shown below.
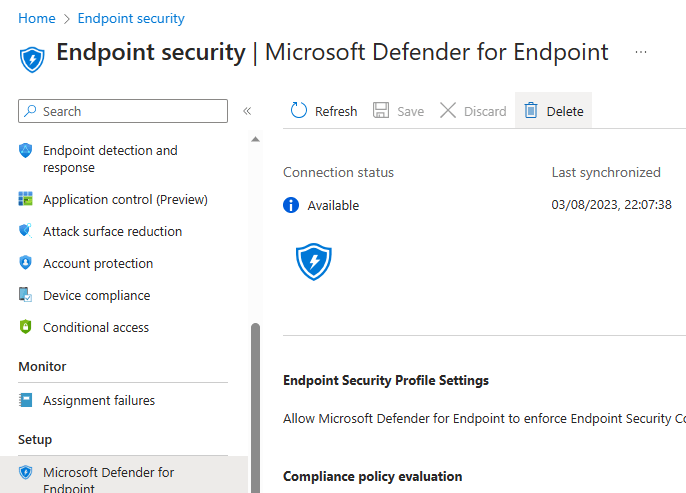
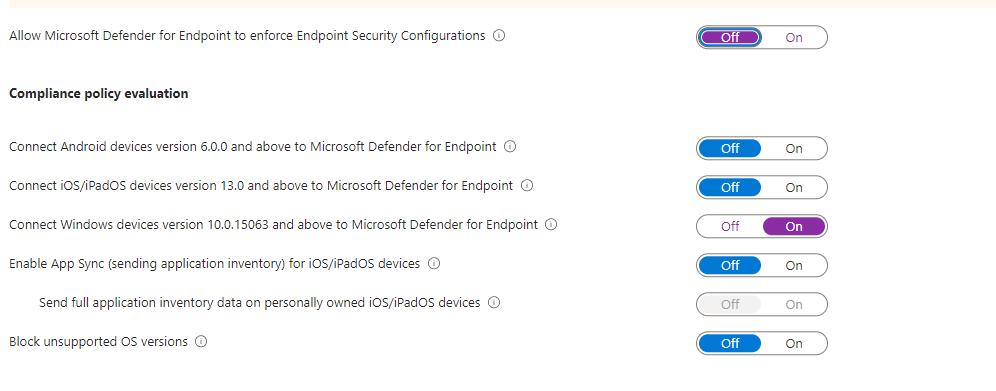
There are a few other settings to enable if we scroll down on this page. We have configured ours as below, although you may want to block unsupported OS versions, and if you will be using MDE on IOS or Android you will want to enable the setting to allow them to connect.
Next we setup the onboarding configuration, this is also required for the MDE sensor so if you see issues with MDE sensors after onboarding double check this policy is applied correctly and you have no conflicts. We go to “Devices” > “Windows devices” > “Configuration Profiles”, and “Create profile”.

Select the options as shown below.
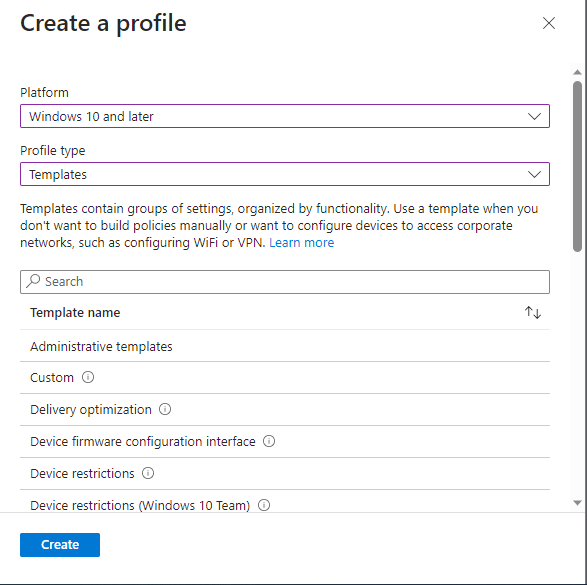
Select the option as shown below.

Give it a name and a description, then select next.

We want to allow sample sharing for all files so we leave this as not configured, although you may not wish to do this, and we also want to expedite telemetry reporting frequency for at risk devices so we enable this setting, then hit next.

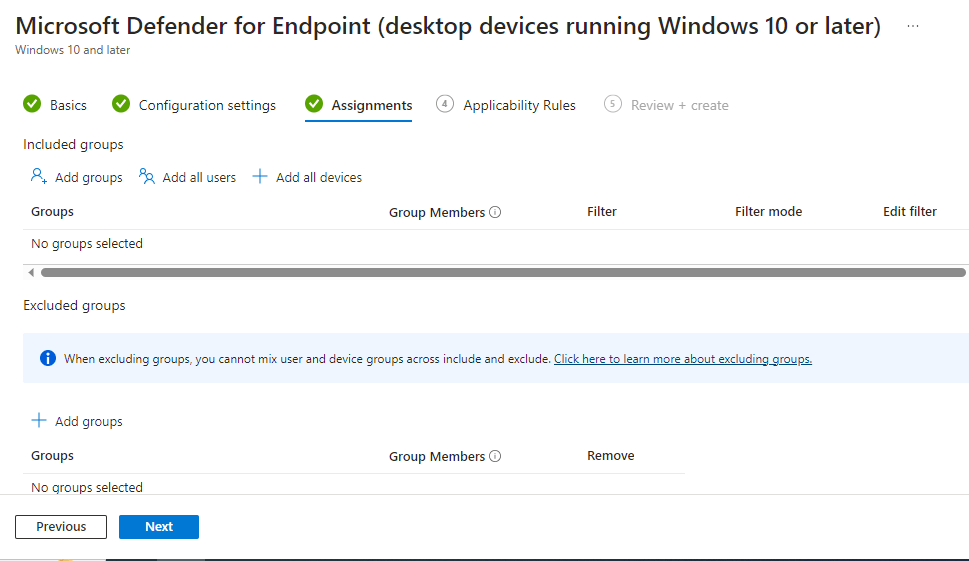
We will assign this policy to our remote users group (the same one we created earlier and will use throughout these guides), then next.
“Applicability Rules” are left as defaults, then we go to “Review + create”. Make sure you are happy with the settings then create the profile.
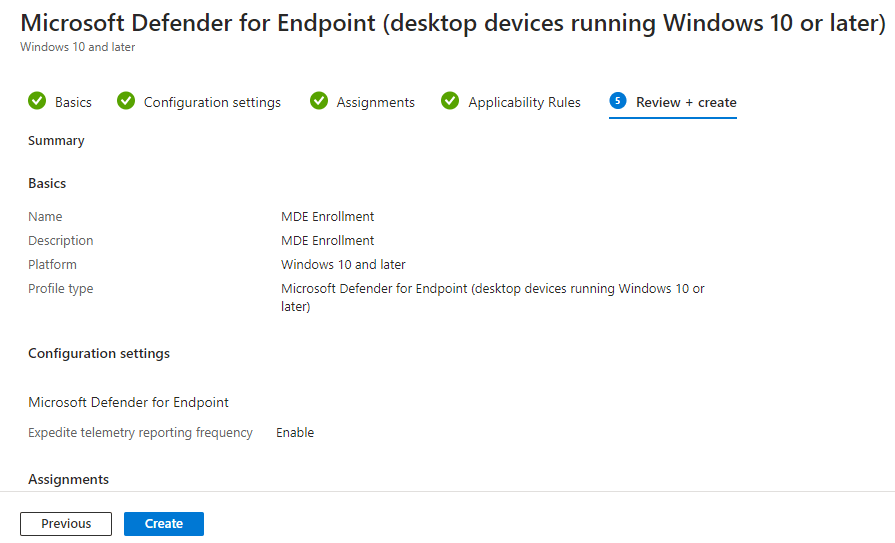
We have now created our connection and onboarding profiles for MDE.
Now all that is done we can create our antivirus policy. From within the Intune portal we go to “Endpoint Security” > “Antivirus”, then select “Create Policy”.

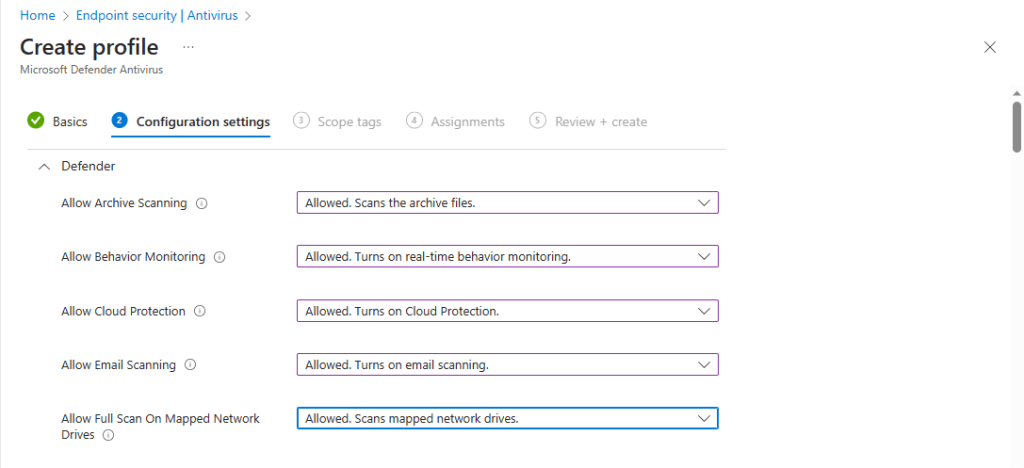
For the profile settings select the platform as “Windows 10, Windows 11, and Windows Server”, and the profile as “Microsoft Defender Antivirus”, then “Create”.

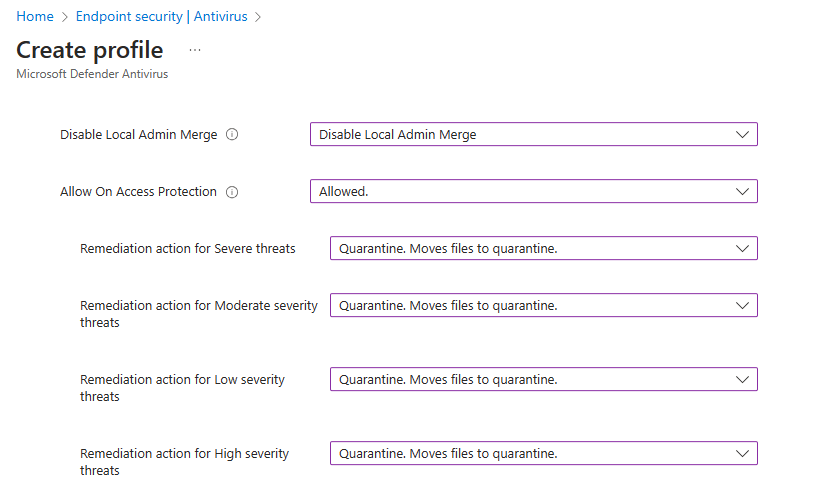
All the available settings for this profile are available here. Jeffrey Appel also has a great blog series on configuring MDE settings which you can see here. We configure our settings as in the below screenshots.


Scope tags are left as defaults.

We are going to assign this configuration to all devices, by using the provided “Add all devices” option.
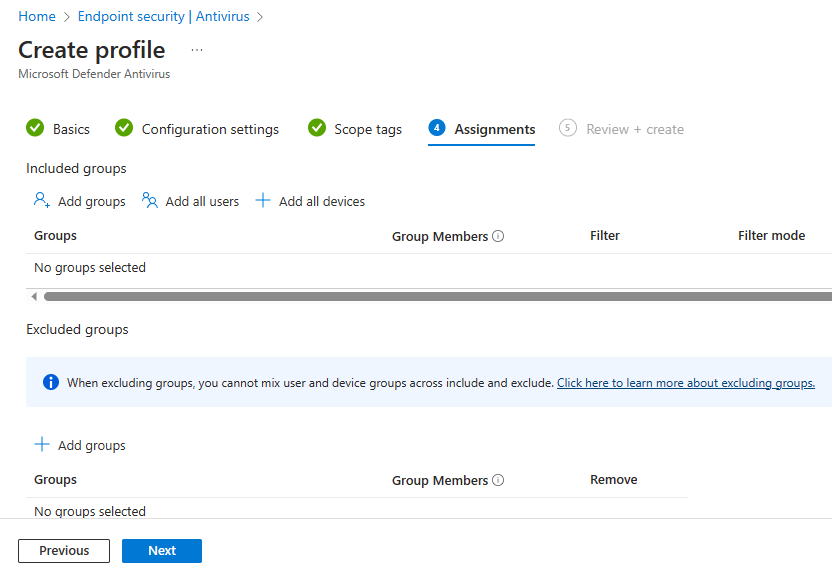
We now review and create the profile.

That’s it. We now have our antivirus policy. In the next guide we create the endpoint protection configuration profile.
