
In the previous guide we configured Antivirus which controls settings like malware scan schedules, network protection, PUA protection, and remediation actions based on alert types. Endpoint protection covers things like Application Guard, Windows Firewall, Credential Guard, and SmartScreen.
IMPORTANT NOTE.
Don’t deploy anything without testing first as you cannot easily roll back restrictive policies applied via Intune. For example, you apply a baseline to a device, but it causes issues so you need to roll back. You can’t simply remove that user or device from the policy to revert all the changes as described in these articles, cant-change-security-policies-for-enrolled-devices and i-changed-a-device-restriction-profile-but-the-changes-havent-taken-effect so make sure all profiles are tested individually to identify any potential issues before they are deployed to a live environment. I would recommend doing a test roll back to make sure you have a well tested back out plan.
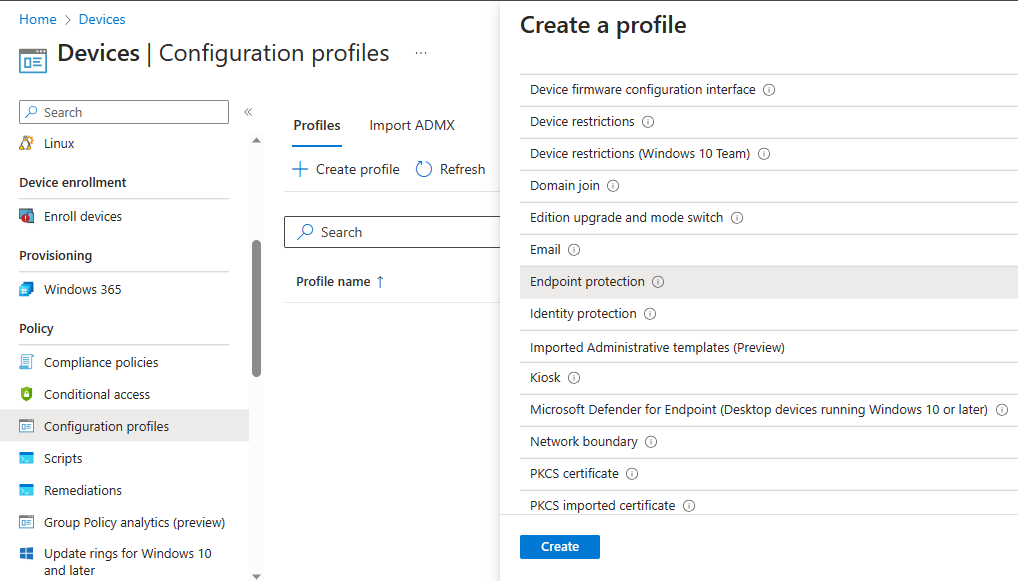
To create our configuration we go to https://endpoint.microsoft.com > “Devices” > “Configuration Profiles” > “Create Profile”. Select “Windows 10 or later” then select “Templates” > “Endpoint Protection” from the below dropdown then hit “Create”.
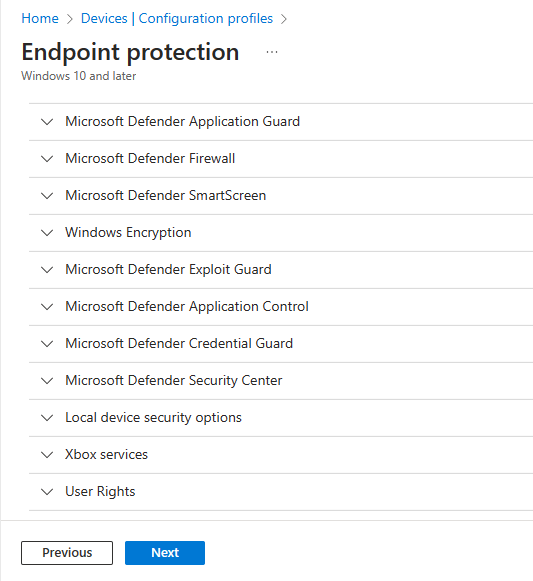
As with the other policies enter a name and a description, hit next and you’ll see the list of sections which all have sub-menus of configurable options.
We will set Application Guard to “Enabled for Edge”.

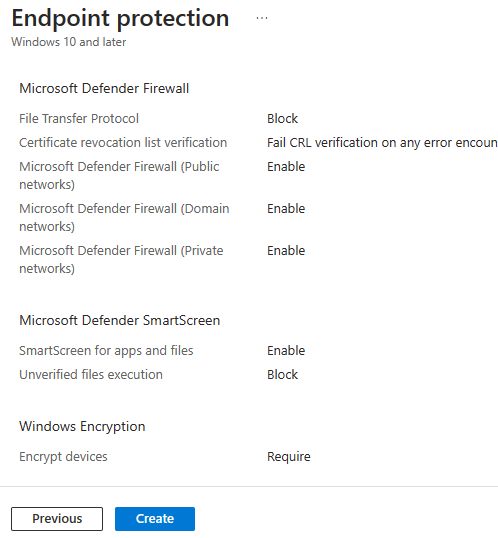
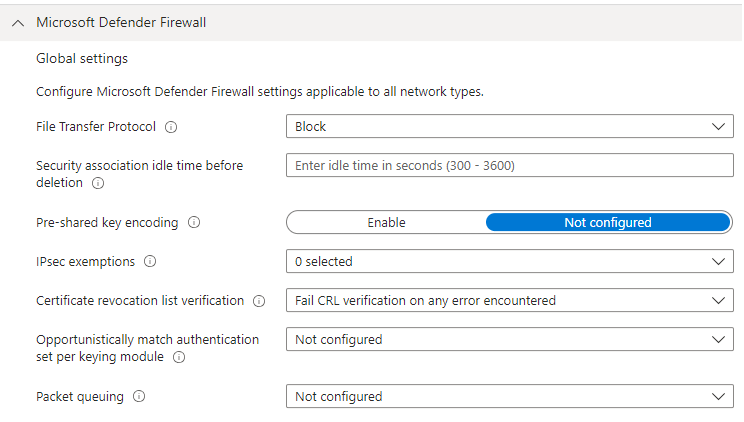
We want to make sure Windows firewall is enabled for all Network Profiles (Domain/Private/Public), and configure CRL verification as below screenshot.

Microsft Defender Smart Screen should be enabled, and we also want to block unverified files from executing.

Under Bitlocker we want to require encryption” and leave the rest as default.

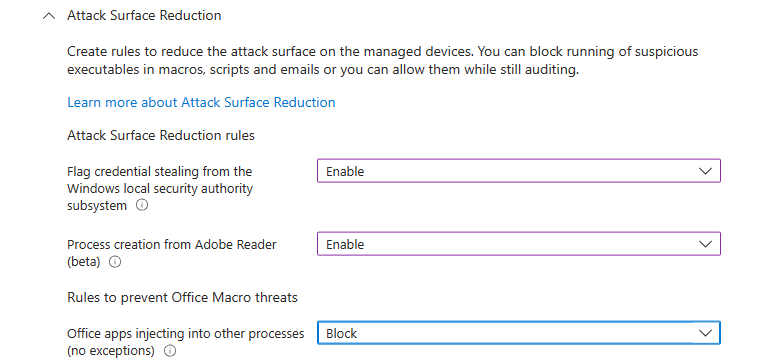
“Microsoft Defender Exploit Guard” > “Attack Surface Reduction” is configured as the below screenshots.


“Controlled folder access” is left unconfigured > “Network Filtering” > “Network Protection” enabled.

“Exploit Protection” left unconfigured (this will be covered in a future blog). “Microsoft Defender Application Control” set to Enforce and Enable as below.

“Microsoft Defender Credential Guard” > “Enable with UEFI Lock”. Although be aware that older endpoints may not support this, and you also require a Windows Enterprise licence.
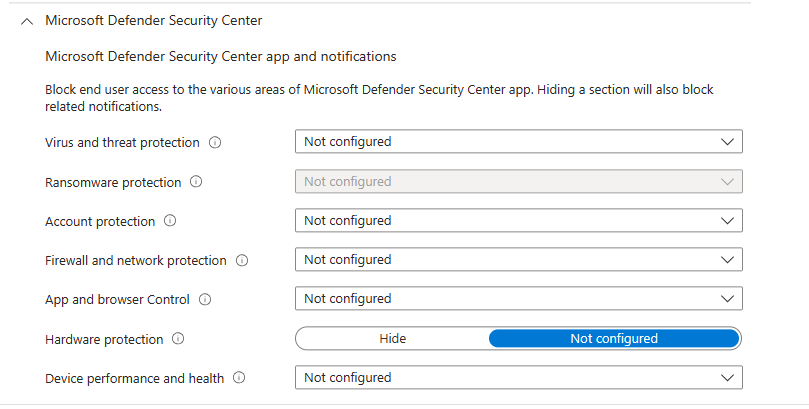
“Microsoft Security Centre” We don’t want to hide notifications or block access to the security center for standard users at this point as we are going to conduct some further testing, so we leave this section as default, however if you want to ensure users can’t access or change these settings you can block access to each section now. We will look this down further after our next review, which will be covered in a future guide.
Tamper protection is an important setting as it prevents attackers from being able to easily disable Microsoft Defender.

Next section you can choose to add custom information to the app and the Microsoft Defender notification.

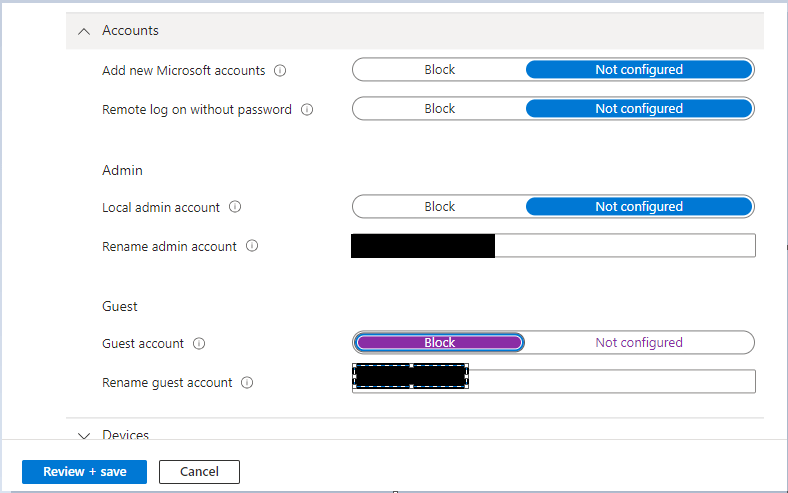
“Local device Security options” > “Accounts” > it’s good practice to rename default accounts. We are leaving the local admin enabled at this point for testing, however once confirmed we will also disable the built in administrator account.
“Interactive logon” > You can add a title and a message of your choice and what user account information you wish to display on-screen.

“Network Access and Security” and “Recovery console and shutdown” can be left using defaults.
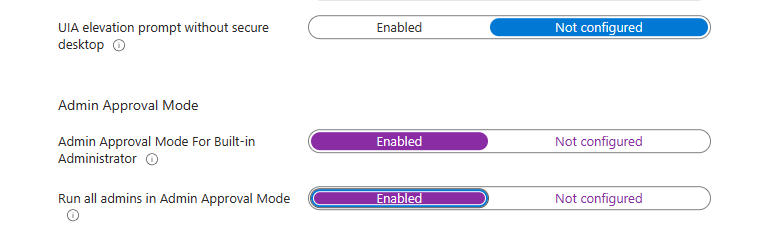
“User Account Control” > We’re going to require credentials for any elevation request and enable admin approval mode for all admin accounts. (This may not be practical for your environment but we want to enfirce it for our environment).

We leave everything else at default and move onto Assignments,

We are going to add our same remote user group for this configuration. You should select whichever groups this should apply to.
The next page allows you to narrow down further who this should apply to, you can apply or exclude by OS version or edition for example. We don’t want to create any further “Applicability Rules” so we skip this step

On the final page we review all our settings before creating the configuration profile.