
We have completed the device configuration profiles, and our compliance policy, which means we now need to move onto deployment.
Before we get into the configuration there are a few things to understand. During enrollment, Microsoft Intune installs a mobile device management (MDM) certificate on the device, which enables the two-way communication and is what enables Intune to enforce enrollment profiles, enrollment restrictions, and the policies and profiles we created earlier in this guide.
A few warnings if you are in a production environment before we get started.
Visit this Microsoft page to assess whether the devcies you are enrolling require a factory reset before they can be enrolled. Make sure you read this to avoid issues later on during your enrollment phase.
Dependant on your environment and permissions model you may also need to look at creating enrollment managers (built-in Azure RBAC permission) as a standard admin can only enroll 15 devices at a time, whereas enrollment managers can enroll up to a 1000 devices. The Enrollment manager account is not compatable with IOS automated device enrollment so make sure you read this Microsoft article before starting any large roll outs.
Enrollment profiles can be very comprehensive, for example you can create device enrollment restrictions to block the enrollment of certain devices, or by make and model.
The first thing we are going to configure is our terms and conditions for the users to accept when they enrol their devices.
IMPORTANT NOTE.
Don’t deploy anything without testing first as you cannot easily roll back restrictive policies applied via Intune. For example, you apply a baseline to a device, but it causes issues so you need to roll back. You can’t simply remove that user or device from the policy to revert all the changes as described in these articles, cant-change-security-policies-for-enrolled-devices and i-changed-a-device-restriction-profile-but-the-changes-havent-taken-effect so make sure all profiles are tested individually to identify any potential issues before they are deployed to a live environment. I would recommend doing a test roll back to make sure you have a well tested back out plan.
Go to https://endpoint.microsoft.com > “Tenant Administration” > “Terms and Conditions” > add click “Create”. Give it a name and description >

text
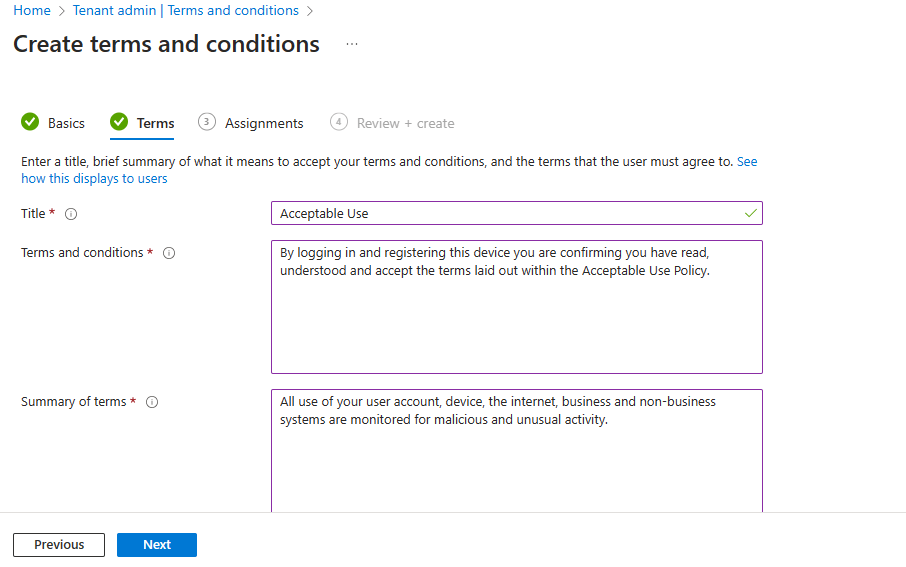
text

If you need them as evidence, you can see who has accepted theTerms and Conditions. The steps to view and export acceptance reports are as below.
Go to Tenant administration > Terms and conditions.
Select your terms from the table.
Select Acceptance Reporting to view available reports.
Select Export to save the reports to your device.
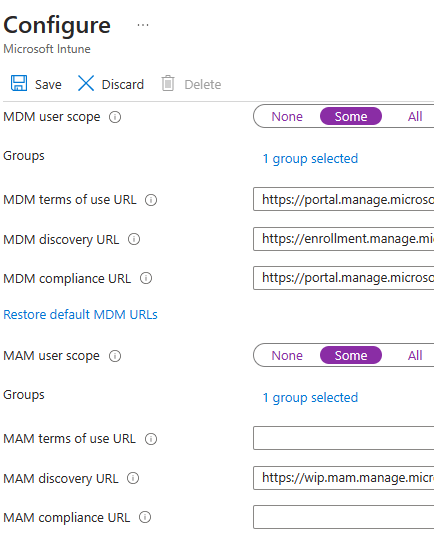
We want to enable auto-enrollment so for these we need to head over to portal.azure.com > Select “Azure AD” > “Mobility (MDM and MAM)”.

Select the “Microsoft Intune” icon.
We will configure MDM and MAM for auto enrollment and then assign this to our remote users group which we have used through the guide. Select “Some” as shown below to enable group assignment selection. Remember to hit save once you have made the required changes.
Autopilot allows you to onboard devices without requiring physical or remote access to the device. You are able to contact certain supported manufacturers who can provide device information which when entered into the Autopilot configuration portal, allows you to preconfigure true “zero-touch” onboarding of devices straight from the supplier.
If you want to investigate this further the full Autopilot documentation is available here.
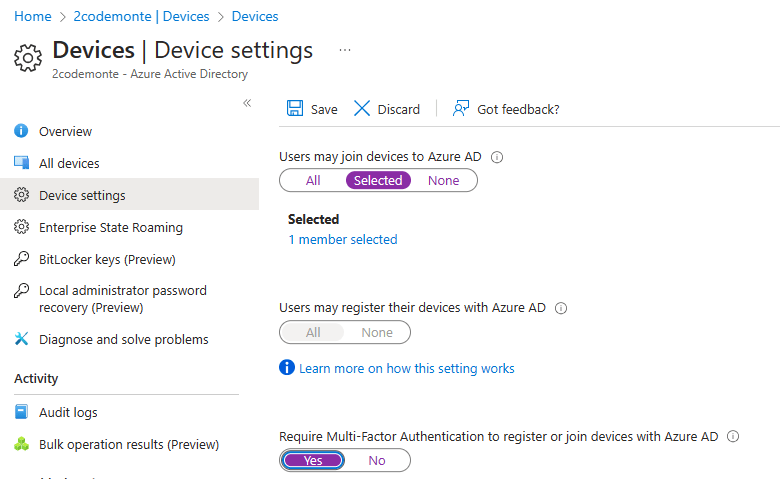
In this guide we will be allowing users to Join Devices to Azure AD. To configure this we need to stay in portal.azure.com got to > “Home” > “Azure AD” > “Devices” > “Device Settings”

From the “Device settings” page > “Selected” and then select the group/s that you want to allow to auto enroll > We will use the same Remote users group > and the the last setting is to require 2FA to register and join Azure AD so we set this to “Yes”. (You absolutely do not want any user to be able to join devices to Azure AD with only a username and password!).
(Be aware that this setting doesn’t apply to hybrid Azure AD joined devices, Azure AD joined VMs in Azure, or Azure AD joined devices that use Windows Autopilot self-deployment mode).
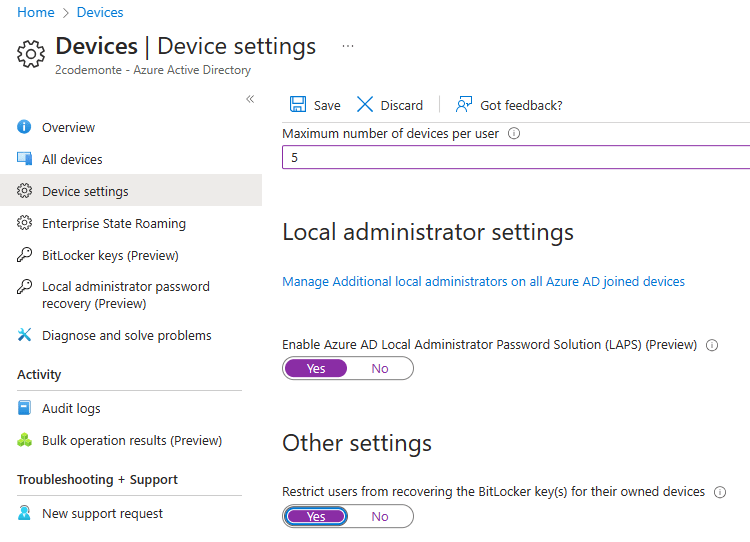
We are going to restrict the number of user devices to 5 (although you can allow a lot more). We enable LAPS to control local admin settings > and block non admin users accessing the Bitlocker decryption key.
Don’t forget to save, when you are finished as this page does not auto save changes.
Next step is to register the devices as Autopilot devices. As all our devices are existing devices, we are going to set them up as “User-Driven” enrollment.
There are several methods to register a device as an Autopilot device in Intune:
- Manually registering devices into Intune as an Autopilot device via the hardware hash. The hardware hash of a device can be collected via one of the following methods:These methods of obtaining the hardware hash of a device are well documented. The corresponding documentation can be viewed by selecting the appropriate link from the above list.
- Automatically registering device via:
- An OEM, including Microsoft Surface devices
- A partner
When using the Windows Autopilot for existing devices scenario, you don’t need to pre-register the devices with Windows Autopilot. Instead, a configuration file (AutopilotConfigurationFile.json) containing all the Windows Autopilot profile settings is used. The device can then be registered with Windows Autopilot using the same “Convert all targeted devices to Autopilot” setting.
Go to https://endpoint.microsoft.com > “Devices” > “Windows” > “Windows Enrollment” > “Auto enrollment”.
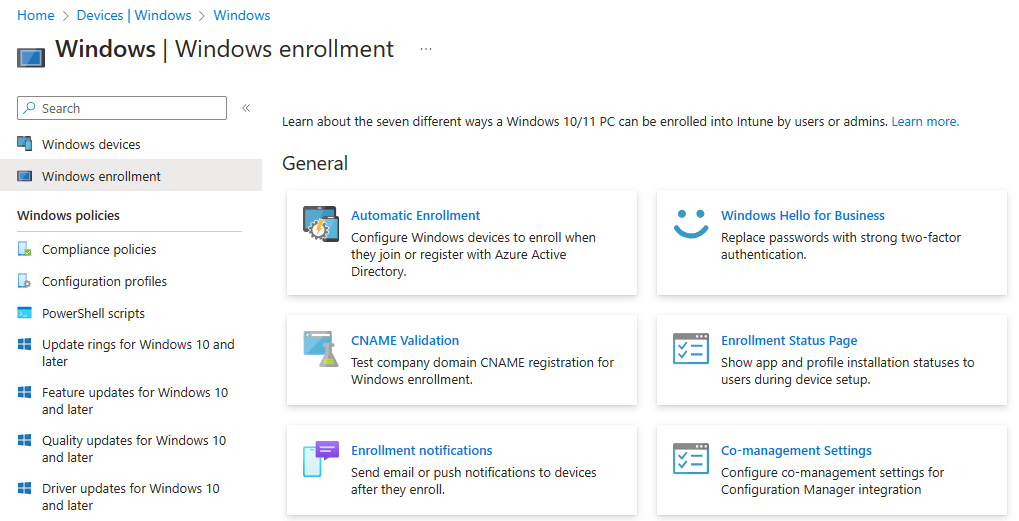
For the below settings, we have selected “Some” and added our remote users group, however you can leave this set to all devices to ensure any device which joins Azure AD is enrolled via Autopilot. Don’t forget to save, as this page does not auto save settings.

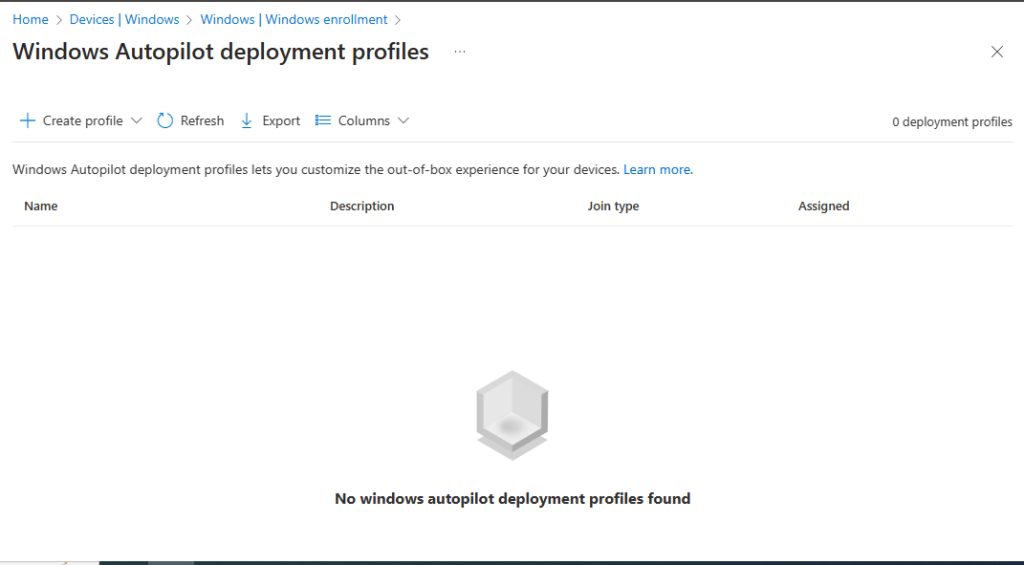
Next we want to create an Autopilot deployment profile. We stay in the endpoint.microsoft.com portal > “Devices” > “Windows” > “Windows Enrollment” > “Create Profile” > “Windows PC”
Create a name and a description, then we are going to convert all targetted devices to Autopilot by selecting “Yes” in the setting at the bottom of the page.
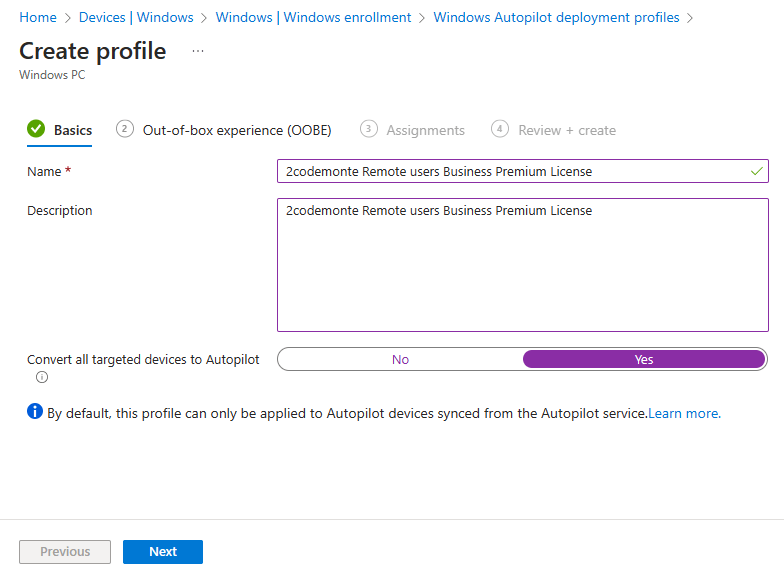
Next is “out-of-box-experience (OOBE)” and this is where we can add them to the local admin group if we need to, assign a device naming convention, configure the language and keyboard settings, and whether we want this to be “User-Driven” or “Automatic”.


Assignments is where we use the same remote users group we have used throughout the demo, then on the final page we review and create.

That’s it. If you have made it this far then well done. All you need to do now is join a device to Azure AD, then login with a relevant user account, and test the configuration. We will cover this step breifly in the next guide.
