

Rolling out conditional access is a big topic, and we will split it into three main phases, preparation, audit and implementation.
Conditional access has the potential to break stuff, a lot of stuff, especially if you are using Intune compliance configurations to block non-compliant devices. If you don’t adequately test your conditional access policies before rolling them out, you could stop all your users logging in and having to scramble to revert the changes and reconfigure in a live environment. We need to be even more careful with our privileged accounts as we can potentially lock ourselves out of our tenant with no way to gain access and hoping Microsoft Support can get us back in!
Fortunately, there is a report-only mode in Entra ID, along with conditional access templates to help us. Part one of this guide will focus on setting up what we need to enable report-only mode, with the following guide looking at enabling report-only mode. Then finally after an evaluation period to assess the potential impact, we will do the final part of the guide and actually enable conditional access for all our users.
To be able to collect and analyse the conditional access report-only logs, and trouble shoot potential issues, we first need to create a Log Analytics workspace in Azure. The full Microsoft guide is here, if you want to reference the official documentation.
NOTE: If you currently have no active subscriptions you may need to sign up for free Azure credits here to get started, or add a new payment method and sign up for Azure services to allow you to create a subscription. Creating subscriptions is beyond the scope of this guide, however the Microsoft best practice guide is here. Make sure you are aware of the pricing tiers before sending any logs to the workspace, although we will be creating a budget alert to prevent any nasty surprises.
To create a Log Analytics Workspace in Azure we go to https://portal.azure.com and search for “Log Analytics Workspace” and select the relevant icon.

We select the subscription we want to use, then fill in the required naming information, and create a new Resource Group if required, and select the region where we want the logs to be stored.

The tags are to make billing easier by providing us with information as to where money is being spent within our tenant – For example; Production or Testing. You can skip this section if you don’t need this.

That’s it we hit “Review + Create”, then after confirming the details we select “Create”.
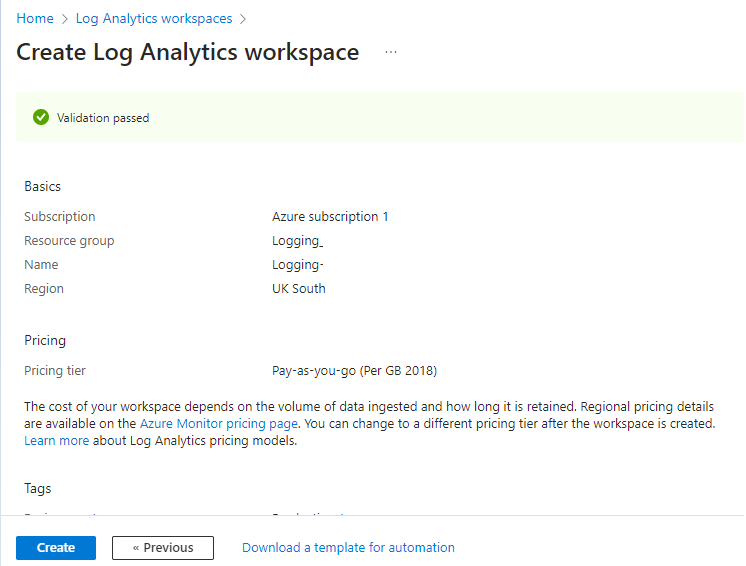
NOTE: It will automatically select “Pay-as-you-go”, however this can be changed before you begin sending any logs to the workspace.
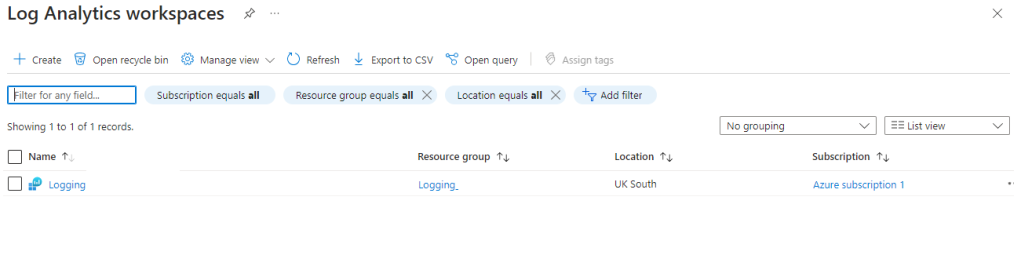
Now when you go to the Log Analytics Workspaces page you will see this new workspace shown.
One more thing we want to do before creating the connection with Entra ID is to set up some costing alerts to ensure we are not going to be hit with a large unexpected bill each month. Especially if you really can’t be sure how much a certain workspace will cost, creating a budget threshold and alert will ensure you are aware of spiralling costs and give you the opportunity to pause the ingestion of logs and look to reduce them, or the retention length to bring down the cost.
Before we create a budget, we may want to create an “Action Group” to receive our budget alerts. To understand “Action Groups” you can watch this video on Microsoft Learn.
NOTE: You can set the alert conditions without an Action Group, however it’s useful to know where this is and have it ready should you wish to add some automation to your alerts. If you wish to skip this step you can go straight to setting up your budget.
To set up our “Action Groups” we use the search bar in the Azure portal at https://portal.azure.com to search for “Monitor”.

Select the “Monitor” menu item, then on the next page select “Alerts” in the left-hand menu, then use the “Create +” dropdown menu to select “Action group”.

This action Group will be associated with a Resource Group, so you need to ensure you select the same Resource Group that contains our Log Analytics Workspace. Provide a name, then a display name, and change the Region if you wish.
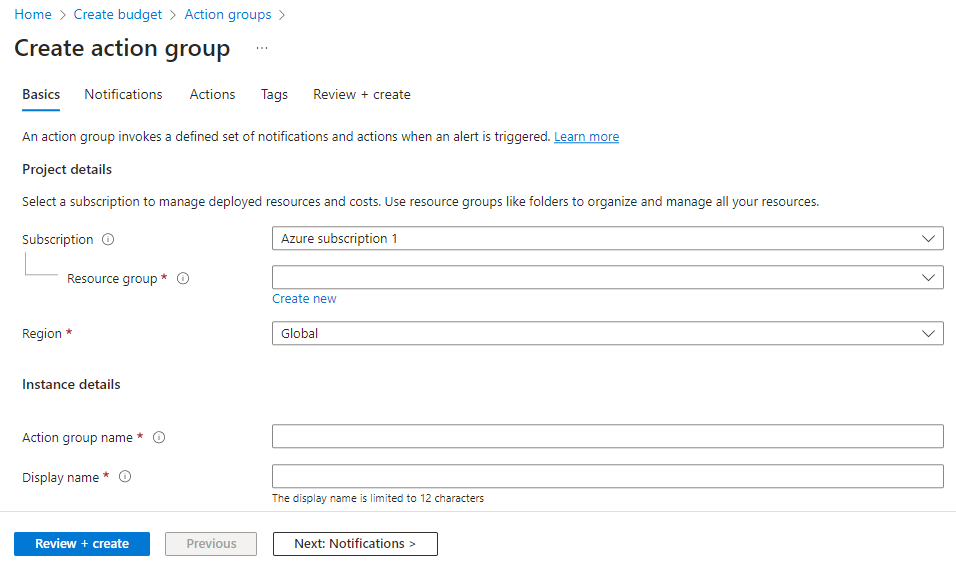
We are going to create a basic email notification type, however you can create Action Groups which trigger a Logic App for example, but that is beyond the scope of this guide.
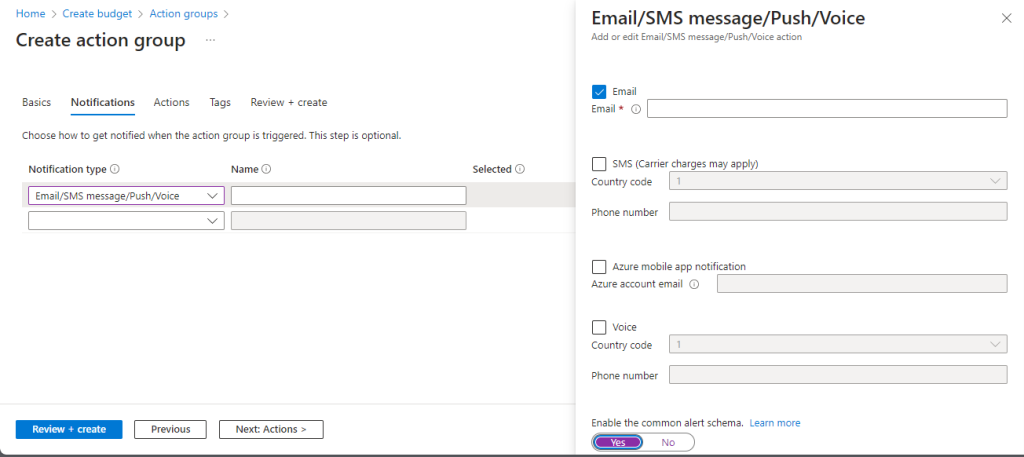
We select the relevant type from the dropdown menu, provide a name, and then select the relevant box in the right-hand sub-menu and add the email address of who should be receiving the alerts. We also select to use the “Common Alert Schema”. An explanation of this is beyond the scope of this guide, however you can find information on it here.
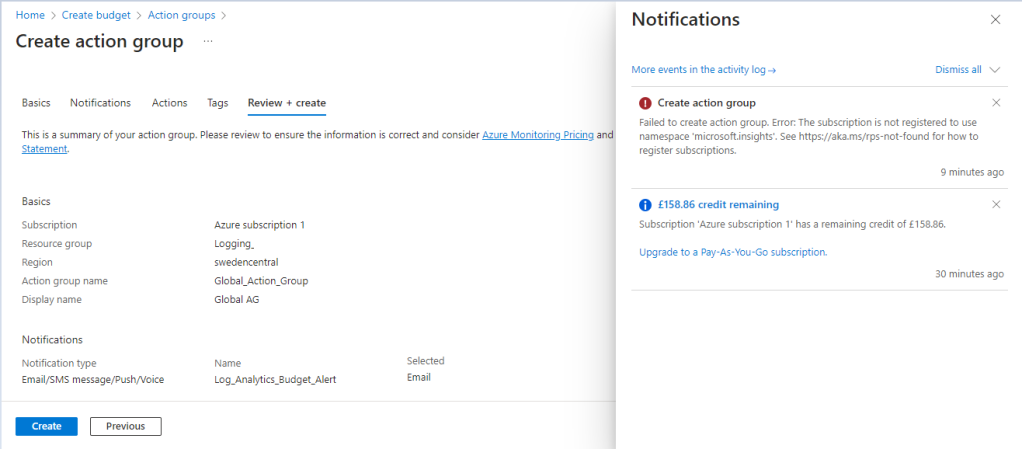
We don’t need to configure “Actions” or “Tags” so skip straight to “Review and Create”. While doing this I received a notification that the group could not be created. I’ve left this error in the guide and provided the solution, as things going wrong is part and parcel of working with IT Systems. You will always encounter things not working as expected.
A quick investigation of the error message shows we need to register a namespace which for some reason has not been registered.
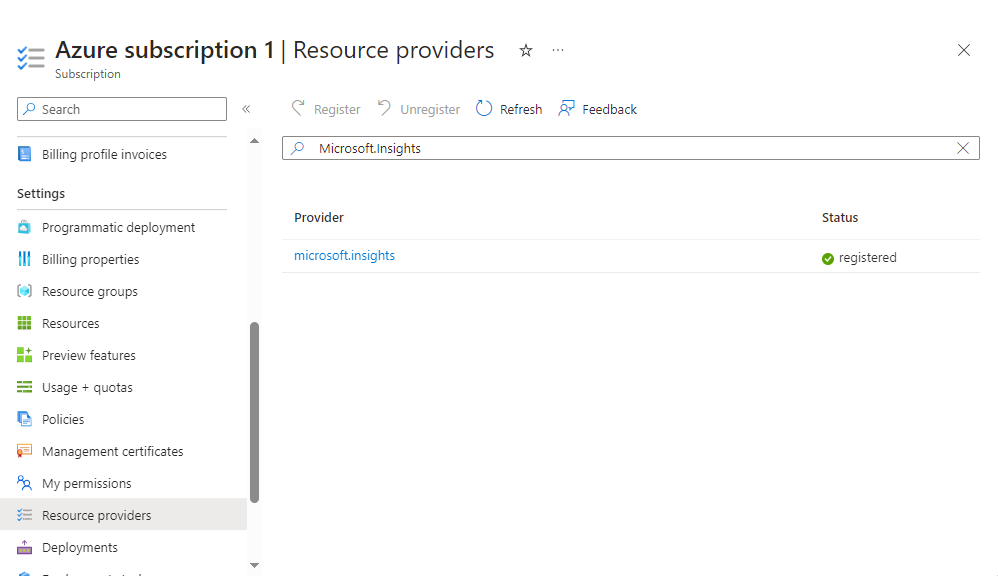
To add a namespace we head over to our Subscription (which would be the one which contains the relevant Resource Group, and Log Analytics Workspace.

We select “Resource providers” in the left-hand menu and use the search bar to look for the missing Name Space. Once we have found it we select “Register” from the options above the search bar, and now it shows as registered. Let head back to our Action Group configuration page and try again.
This time when we hit “Create” the group is successfully created, and when we look in the “Action Groups” page our new group is now displayed. Now we can create our Budget alert.

Go to your azure home page at https://portal.azure.com, search for “Resource Groups”, click the relevant tile then select the resource group you want to set the budget for. Scroll down to “Budget”, add budget.
There’s not much to configure here, just a name and the period we want the alert active for, then the budget amount. We are going to set this quite low as we do not want to incur a high cost from the conditional access logs.

After hitting “Next” we want to be alerted when we have actually hit the budget amount rather than if it is expected we will hit the budget or when we reach 80% of the budget. We also configure the previously created Action Group”, then add an email address for the generic email alert.

We set the language, then create the budget.

If successful the new budget will appear in the budgets page as shown below.

The next step is to integrate Entra ID logs with the Log Analytics Workspace, which will allow us to do the following in the below list, if we integrate ALL log types. We will not be enabling all this functionality in this guide as we are focusing on Conditional Access, but if you want this functionality you can select all the logs types at the relevant step.
- Compare our Microsoft Entra sign-in logs against security logs published by Microsoft Defender for Cloud.
- Troubleshoot performance bottlenecks on our application’s sign-in page by correlating application performance data from Azure Application Insights.
- Analyze the Identity Protection risky users and risk detections logs to detect threats in our environment.
- Identify sign-ins from applications still using the Active Directory Authentication Library (ADAL) for authentication. Learn about the ADAL end-of-support plan.
- Allow us to evaluate our conditional access policies.
NOTE: Integrating Microsoft Entra logs with Azure Monitor automatically enables the Microsoft Entra data connector within Microsoft Sentinel. We will be covering Sentinel in future guides.
Let’s head over to the Entra ID portal at https://entra.microsoft.com and get started.
We go to Identity > Monitoring & health > Diagnostic settings
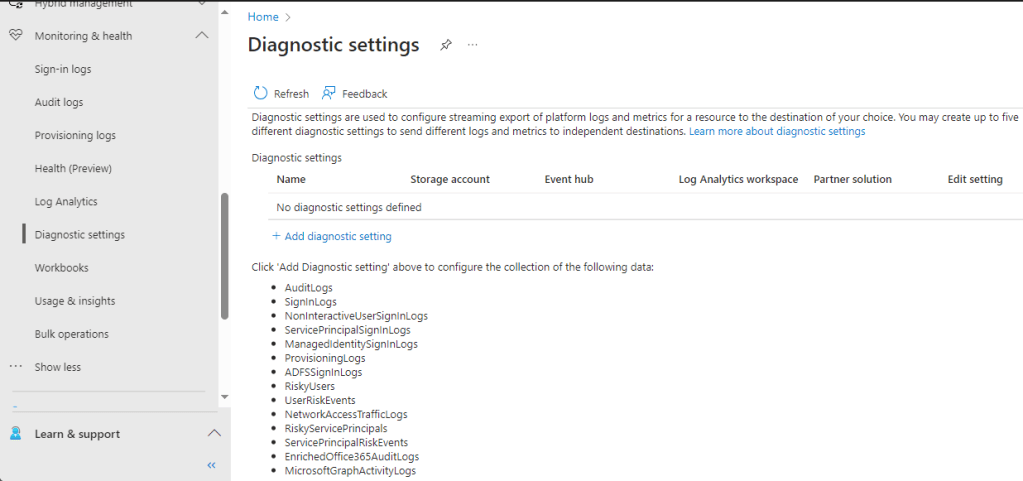
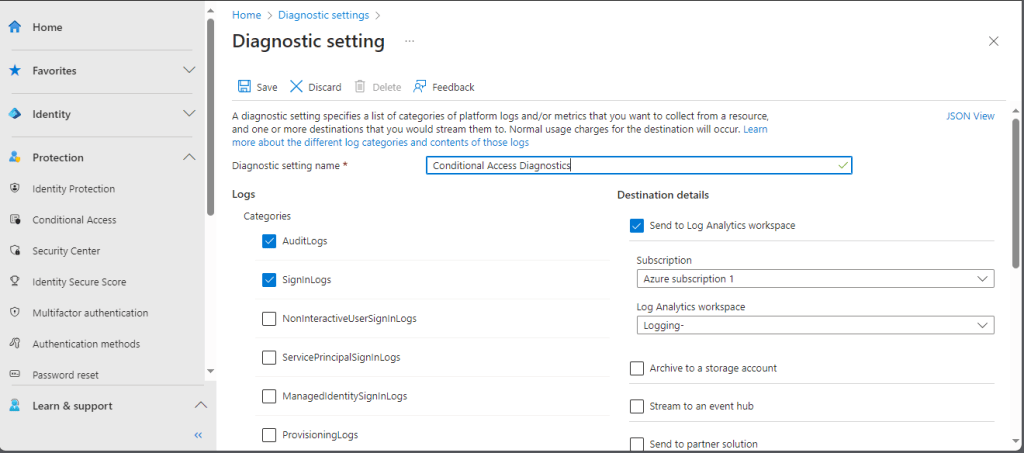
Select “Add a diagnostic setting” to add our new integration, and create a name. Be aware that this name is permanent and can not be changed later. Then we need to select the log categories we want to stream, and select the box which sends the logs to our analytics workspace. We select the correct subscription and workspace then make sure we save our settings. The conditional access logs are contained within the “Signin Logs”, it’s useful to have the “Audit Logs” too, but these should not be required and we can always add them later if we want them as the Log Categories section is editable after the setting is created.
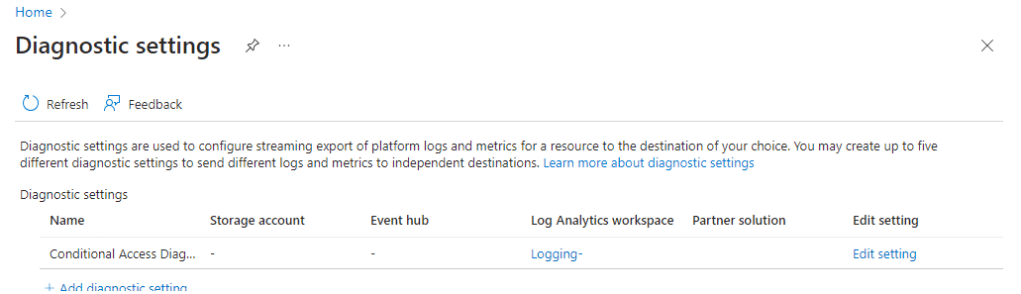
If successful you will see your new diagnostic setting on the diagnostics main page.
That’s it, we are now sending the selected Entra ID logs to our Log Analytics Workspace. It can take 15-30 minutes for logs to start appearing, so it they don’t appear straight away don’t panic and give it some time.
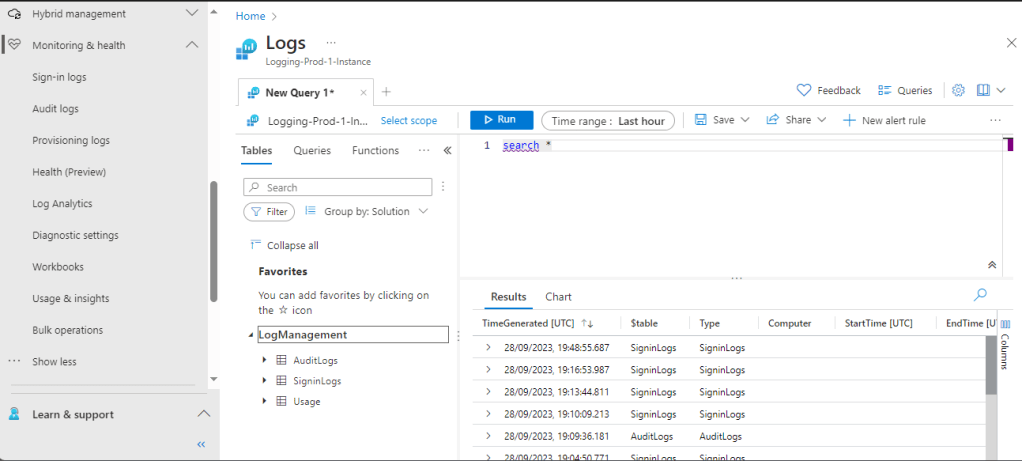
Once we are recieving logs we can view the log analytics workspace from within the Entra ID portal at https://entra.microsoft.com rather than having to use the Azure portal. We go to “Identity” > “Monitoring and Health” > “Log Analytics”, and we see the below display.
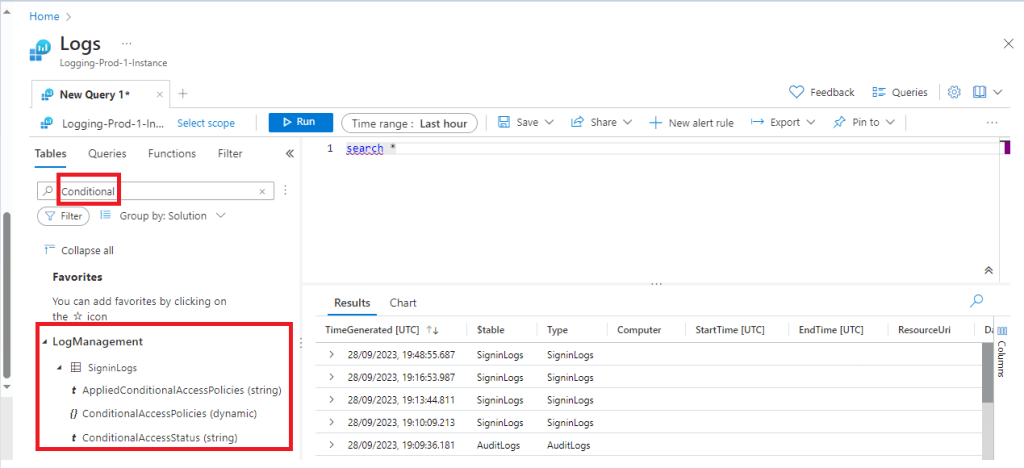
We can use the Search box and look for “conditional”, and this shows us that we will find conditional access logs under “Signin Logs”.
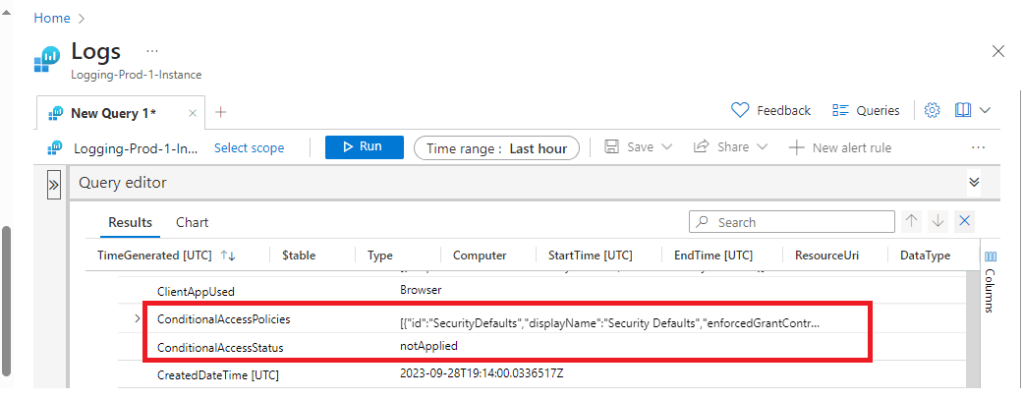
We can click on one of the individual logs in the viewing pane and expand it to find the conditional access information related to a specific signin log. Below we can see that currently this test user does not have any conditional access policies applied as the status shows as “notApplied”.
In the next guide we will create our report-only conditional access policy and use our log analytics workspace and workbooks to evaluate our policy before we roll it out in production.
