

In the previous guide we created our log analytics workspace, and took care of a few prerequisites which would allow us to create and troubleshoot our conditional access policies before they are fully implemented. In this guide we will create our conditional access policies in report-only mode, and using the built-in conditional access workbooks we will be able to fully assess the impact of any potential changes.
Note: Report-only mode is not applicable for Conditional Access policies with “User Actions” scope.
Building a Conditional Access Policy
Conditional Access policies are basically just “if” statements which allow you to grant or block access based on those “if” conditions.
A policy can contain multiple condition types which can be based on those listed below.
- Location.
- Device Platform.
- Sign-In Risk.
- Client Apps.
- Device attributes.
The Access Controls part of the policies will control how the policies are enforced, and provides the ability to either grant or block access. The “Grant” enforcement types are listed below.
- Require multifactor authentication
- Require device to be marked as compliant (Intune)
- Require Microsoft Entra hybrid joined device
- Require approved client app
- Require app protection policy
- Require password change
- Require terms of use
There are also “Session” controls and the full functionality as stated by Microsoft is listed below.
- Use app enforced restrictions.
- Currently works with Exchange Online and SharePoint Online only.
- Passes device information to allow control of experience granting full or limited access.
- Use Conditional Access App Control.
- Uses signals from Microsoft Defender for Cloud Apps to do things like:
- Block download, cut, copy, and print of sensitive documents.
- Monitor risky session behavior.
- Require labeling of sensitive files.
- Uses signals from Microsoft Defender for Cloud Apps to do things like:
- Sign-in frequency.
- Ability to change the default sign in frequency for modern authentication.
- Persistent browser session.
- Allows users to remain signed in after closing and reopening their browser window.
- Customize continuous access evaluation.
- Disable resilience defaults.
Microsoft Intune allows us to apply device and app based policies via Compliance Policies and we will be looking at this in future guides, but if you want to read up on it now, the Microsoft gudie is here. Be aware that if you have strict compliance policies then it is likely that devices will often be prevented from accessing resources so ensure your Service Desk has the resource and processes to deal with that, or have good automation and remediation in place.
We are going to use a template initially, and then gradually include more resrictive policies to improve our overall posture and reduce the attack surface. You can read about all the available templates here.
NOTE: Before configuring and implementing your Conditional Access Policies you should definitely read this Microsoft documentation on securing emergency or “break-the-glass” accounts. You want to be sure that you will not get locked out of your tenant and before you think to yourself “that will never happen”, it does, and more often than you may think.
To create our first Conditional Access Policy we head over to the Entra ID portal at https://entra.microsoft.com then from the side menu go to Protection > Conditional Access.

Then from the top menu select “New Policy from Template”, then we want to select the “Require multifactor authentication for all users” template.

Now we provide a name, and make sure it is set to “Report only”.
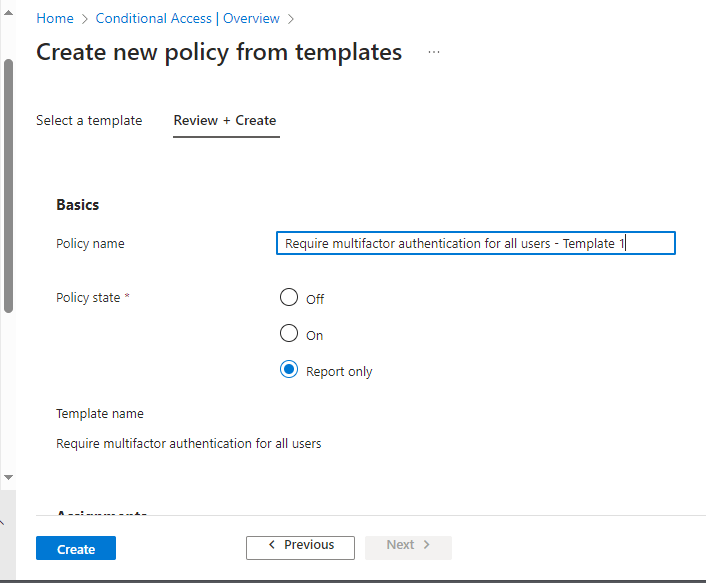
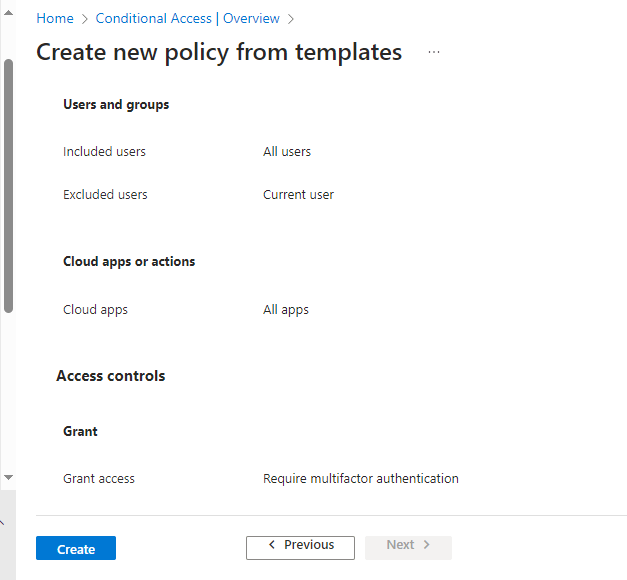
Currently we can see that this policy applies to all apps and all users, but don’t worry we can change these if required after the policy is created.
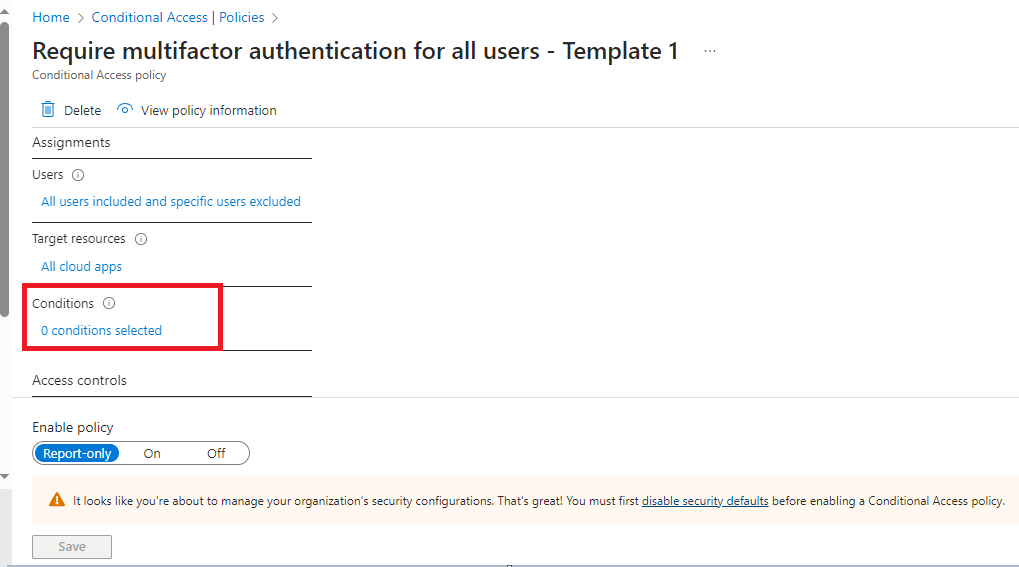
If created successfully then we will be able to see the policy in the “Policies” page as shown below.

Let’s go into the policy and take a look at what is configured within the template. As you can see there are currently no conditions applied which means all users will be required to use multifactor authentication at every login (Except the user account that created the policy as they are automatically excluded to ensure you are not instantly locked out of your tenant!).
Moving forward we will start to apply further conditions which will mean multifactor authentication will not be required if the login is considered low risk, and will be completely blocked if considered at a critical risk level. We will also create a policy which requires highly privileged accounts to provide 2FA everytime they login, but this will be in a future guide.
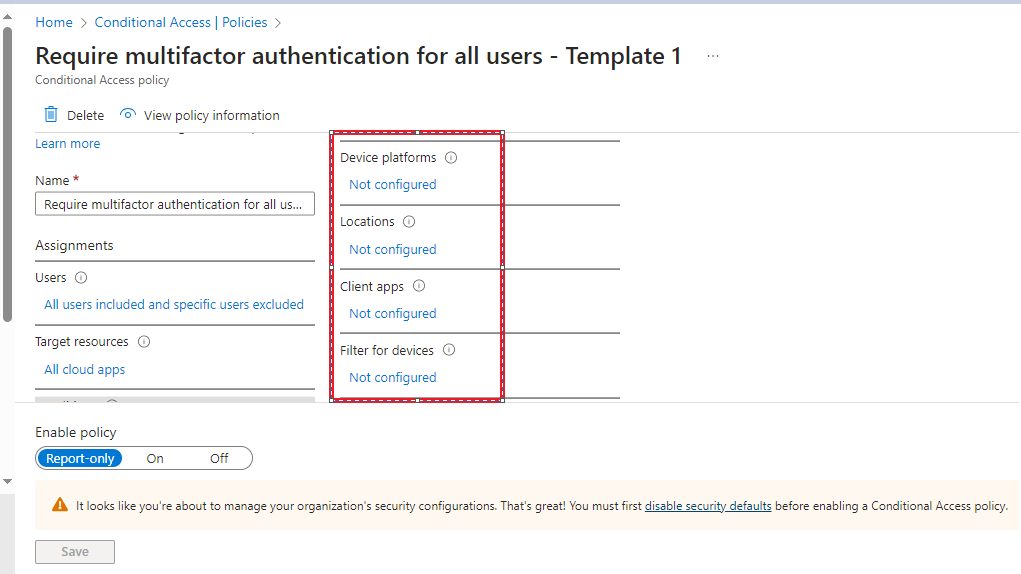
Clicking on “0 conditions selected” shows us a breakdown of the items, and if any are configured. You can also see a warning at the bottom of the page that states “Security Defaults” need to be disabled before Conditional Access policies can be fully applied.
Under the “Policies” menu item (Under Protection > Conditional Access) we go to “Insights and Reporting”, we can use the “Impact summary” to get a breakdown of the impact of the new Conditional Access policy.
The below tiles are interactive, and can be used to further filter the report. The explanation for each tile is as below.
Total: Number of users in the Last 24 hours
Success: Number of users where the selected polic(ies) granted access and the required controls were satisifed
Failure: Number of users where the selected polic(ies) denied access and the required controls were not satisfied
User action required: Number of users where the selected report-only policy applied but user action (e.g. MFA or Terms of Use) would be required if the policy were enabled.
Not applied: Number of users that are bypassing the selected polic(ies) because the sign-in did not match at least one of the assignments or conditions.
In our example below, we can see that we have had a login which did not require multifactor authentication which means if this policy was fully applied that user would have been prompted for a second factor even though the current controls in-place did not require it. This is the crux of what we are trying to achieve and assess. Even if security defaults are enabled then users may not be prompted for 2FA on every login, this new policy would force all users at every login to provide a second factor. This is not necessarily desirable, and not actually best practice, if an account is logging in from their assigned device, at the organisations office and is compliant with Intune policies, do we really need to force the user to provide multifactor authentication to login to their device? This is where we need to look at our risk appetite and create an appropriate policy for the different security groups in our organisation. Another example is a Global administrator account, do we want to force multifactor authentication for all logins regardless of any other condition? Yes (Excluding the specific recommendations for break-the-glass accounts covered previously).

You can use the below dashboard to view a breakdown per condition and sign-in status.

We can also make use of Workbooks via the Entra ID portal by going to https://entra.microsoft.com then from the side menu go to Protection > Monitoring and Health > Workbooks.
Here we find the same Workbook that we have already looked at in the previous step under the “Policies” menu item (Under Protection > Conditional Access) using “Insights and Reporting” option. We have highlighted it below.

We are now going to show the Conditional Access Gap Analyser, which is available via a tile in the above screen shot.
From this Workbook we can report on the following.
- Legacy Authentication.
- Unprotected Applications.
- Compromised User Sign-ins.
- Unprotected Locations.
- Unprotected Named Locations.
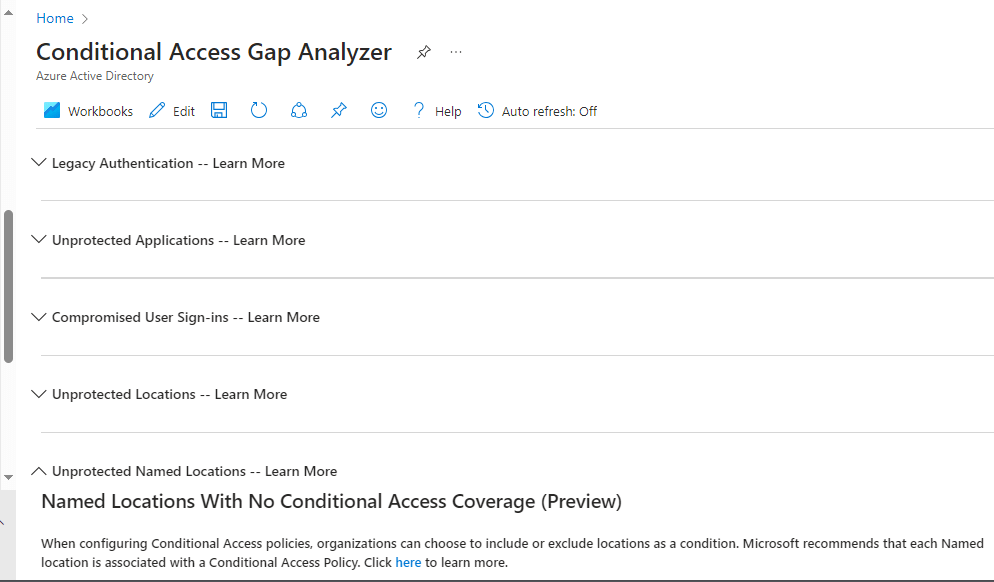
This workbook is useful if you need to identify where in your tenant Legacy Authentication is still being used if you are looking to disable it. We can expand the item for more detail as shown below.

This Workbook also allows us to ensure we are not allowing High Risk sign-ins, especially as we start to mature our Conditional Access Policy and it increases in complexity. It’s easy to make a mistake which inadvertantly makes your posture worse, so using these Workbooks is important in ensuring your policies are working as expected.

That’s how we create a Report-Only Conditional Access Policy, next we move on to improving these policies and monitoring their impact via this method before finally disabling Security Defaults, and enforcing them in a live environment.
