

Verifying that our Windows endpoints are using the expected configuration is a key part of ensuring our attack surface is as we expect, this is also known as OS hardening. Endpoints and servers are obviously one of the most at-risk components of our infrastructure and so we want to ensure they have a strong baseline configuration and that this remains consistent throughout the lifetime of the endpoint or server.
This is easier said than done of course, as there are hundreds of local GPOs we can use, so understanding what we have in place is difficult enough, and this does not include ensuring that they are not being changed during business as usual by IT technicians, internal IT support, third party support engineers or anyone with the permissions to do so. This isn’t always carried out maliciously, keeping an enterprise running is tough, and the first priority for support staff is to fix the issue. Sometimes this will mean disabling a rule or changing a GPO to resolve the issue, but this information will not always reach the security team.
If we have access to Intune or MECM, we may also wish to verify that what is being reported within the dashboard is correct. Telemetry and reporting issues do occur so we should not take it for granted that everything is always as it seems.
Microsoft provides a free toolkit that we can use to check our configurations, compare them side by side with our preferred template or Microsoft Security Baseline, and also roll out configurations to our endpoints.
The Microsoft Security Compliance Toolkit will allow us to compare the current state of our endpoint down to an individual GPO setting level side by side with a Microsoft Security Baseline, or our standard endpoint image.
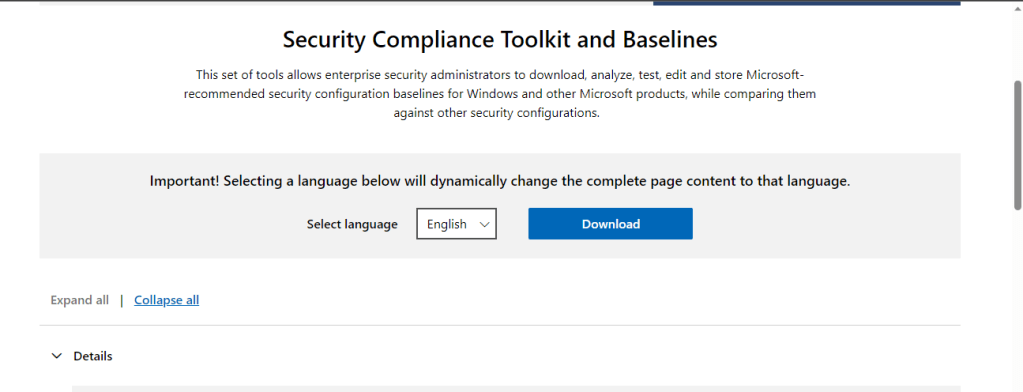
The Microsoft Security Compliance Toolkit (MSCT) can be downloaded from here, and contains a lot of different items. We wont be downloading all of them for this guide but I encourage you to have a good look at them all.
For this guide we’re going to download the items which are ticked in the screen shots below.


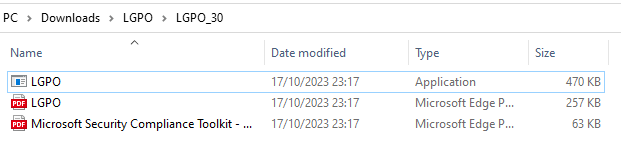
Below we have the downloaded zip files which will need to be extracted to your preferred location.

We are going to start by quickly going through LGPO. If we go to the LGPO folder you can see the exe and an instructional PDF file. This is a command line tool and the PDF contains all the switches you need. LGPO has more functionality than we are covering here so it’s worth a read.
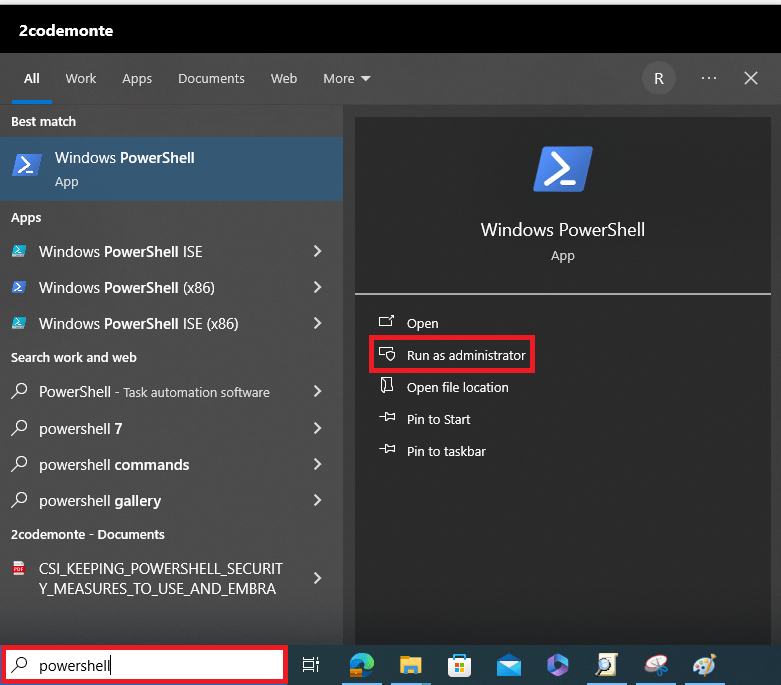
We are going to use LGPO.exe to create a backup copy of our local machines GPOs, so first we launch PowerShell as administrator.
Then change to the relevant directory to run our commands.
If our case we have kept everything in our Downloads folder so we will use the below which takes us to the folder shown above which contains the LGPO exe.
“cd C:\Users\RobertWinter\Downloads\LGPO\LGPO_30”

Next we run the executable to create our GPO backup. In the command below we running LGPO.exe the “/b” is the location we want to save the file, and the “/n” is the file name. Easy right.
“./LGPO.exe /b C:\Users\RobertWinter\Downloads\LGPO\ /n GPO-EXPORT-18-10-2023”
In the screen shot below we can see the command has completed successfully and created our GPO backup.

Next we browse to the Policy Analyser Folder and find the application. This does not require installation and has no dependences so we can run this directly from here whenever we need it, or copy and run from a USB. This folder also contains the Policy Analyser manual which provides all the instructions you need to get started and use the tool.

Let’s fire up the Policy Analyser Application as administrator and compare our local machine policy with a recommended baseline.

When the analyser first opens we have no policies available so we need to import the ones we want using the “Add” button.

Policy Analyser gives us the ability to compare individual policies, templates or configurations, but also allows us to combine multiple policies into a baseline and use this to compare settings. We are looking to compare our endpoint settings to a Microsoft recommended baseline so we will import everything we need into an individual file and use it to compare with our baseline.
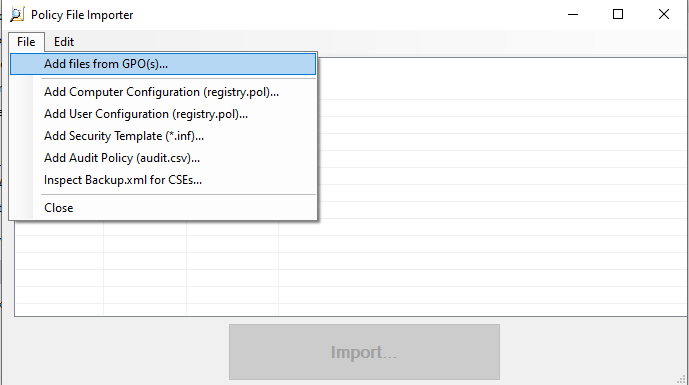
The first thing we are importing is the previously downloaded Microsoft baseline (when we downloaded the MSCT) for our OS version using the “Add files from GPO(s)” option.
We browse to where we saved the baseline, select the top level folder (which means the analyser will load all GPOS contained within the folder).

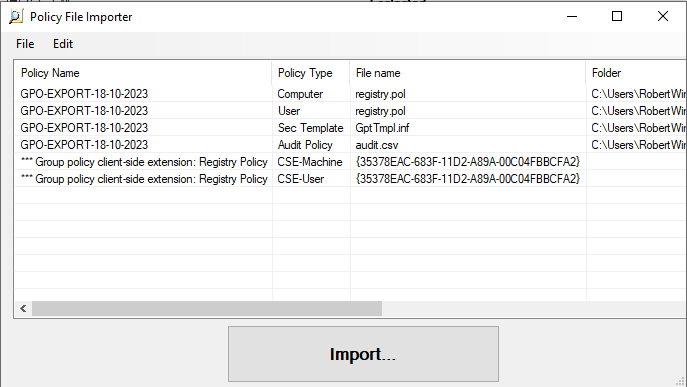
We will then see all the GPOs that will be included in our baseline which we will benchmark the local machine against. Hit “Import”.

We then need to create a name for this new file which is the baseline that contains all the selected GPOs for our baseline.

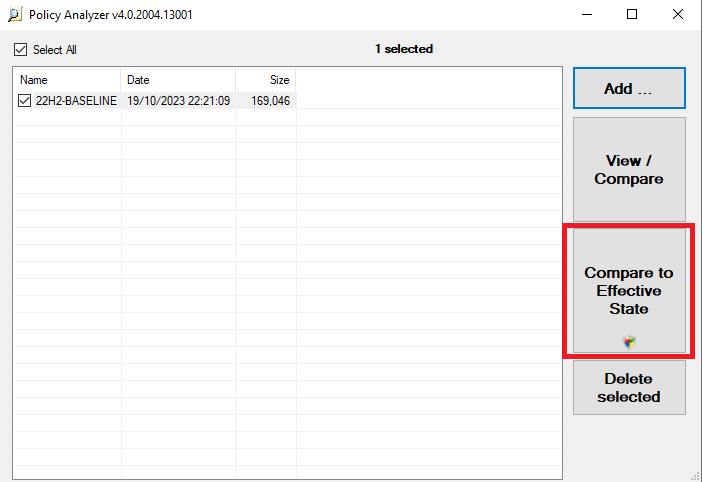
Once saved it will appear in our main screen as below. The easiest way to compare this Microsoft recommended baseline to our current machine state is to use the button highlighted below “Compare to Effective State”. This will create a second file which will show in the below window and will have “Effective State” in the file name.
However as we previously created a manual backup of our local GPOs using the LGPO tool, we are also going to show how to load this file. The convenience of the effective state comparison comes into play after we have made changes as we will show later.
NOTE: This file created by the LGPO tool should be the same as the settings within the current state comparison created by the Policy Analyser tool.
From the main screen using the “Add files from GPO(s)” option as before, browse to the location of the saved GPO backup and select the top level folder.

This again will show all the individual policies and settings that were created when we ran the LGPO tool.
When we click import we will be asked to name the new file, then it will appear in the main page along with our effective state configuration file.
We can compare multiple files at the same time by selecting the ones we want. We are going to compare the downloaded baseline with our manually created GPO backup. Once selected we use the “View/Compare” button.

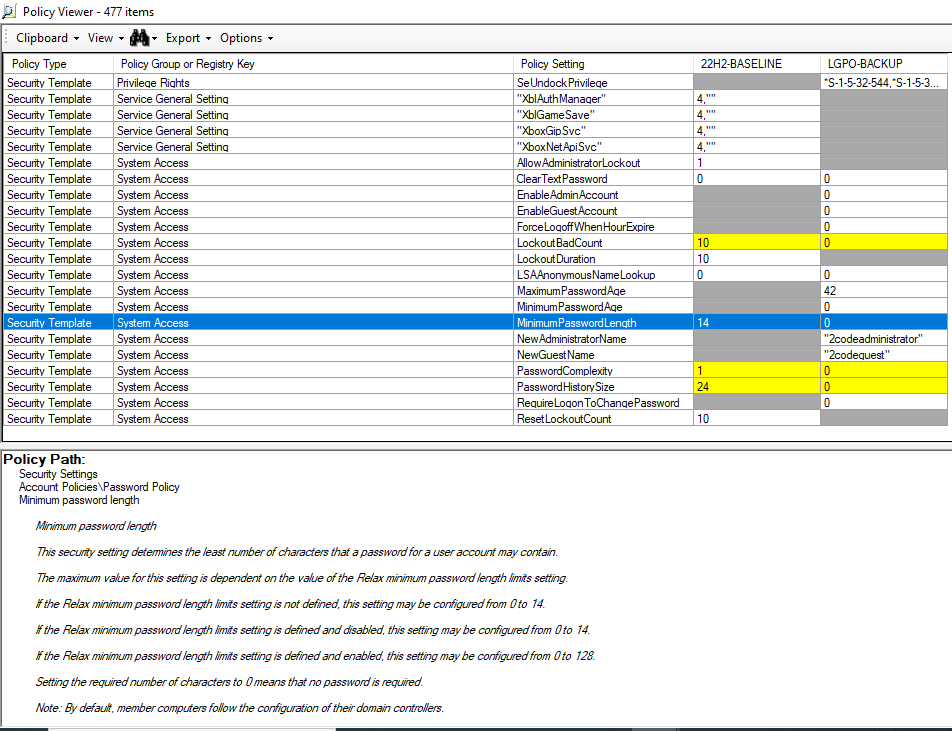
In the comparison screen we see all the settings contained within our configuration files and are able to compare them side-by-side. Cells highlighted yellow represent a conflict/difference, grey shows the setting is absent, and white means they are configured the same. When a particular setting is selected we also get a full description and the location of the setting to allow us to easily assess and remediate any issues.
Let’s resolve an example conflict. In our example we select the “MinimumPasswordLength” which in the recommended baseline shows as “14” but our local machine is set to “0”. The information panel shows us where this setting is so let’s go to the relevant GPO setting.
Search for gpedit.msc in the Windows search bar, and run as administrator.

We go to the relevant setting under “Password Policy”.

We edit the setting as per the baseline and save our changes.

We can see below that it is now set to 14 characters.

Let’s force a group policy update before again comparing policies. Let’s open a cmd prompt as administrator.

We run “gpupdate /force” and receive a completed successfully message. You may be prompted to log off and back in for the change to apply depending on the policy change and the environment.

We head back over to policy analyser, and firstly we need to delete the previous current state so we don’t get confused, and we don’t really need it anymore. (It can be kept for future reference). To delete it, we select it and use the “Delete Selected” button.

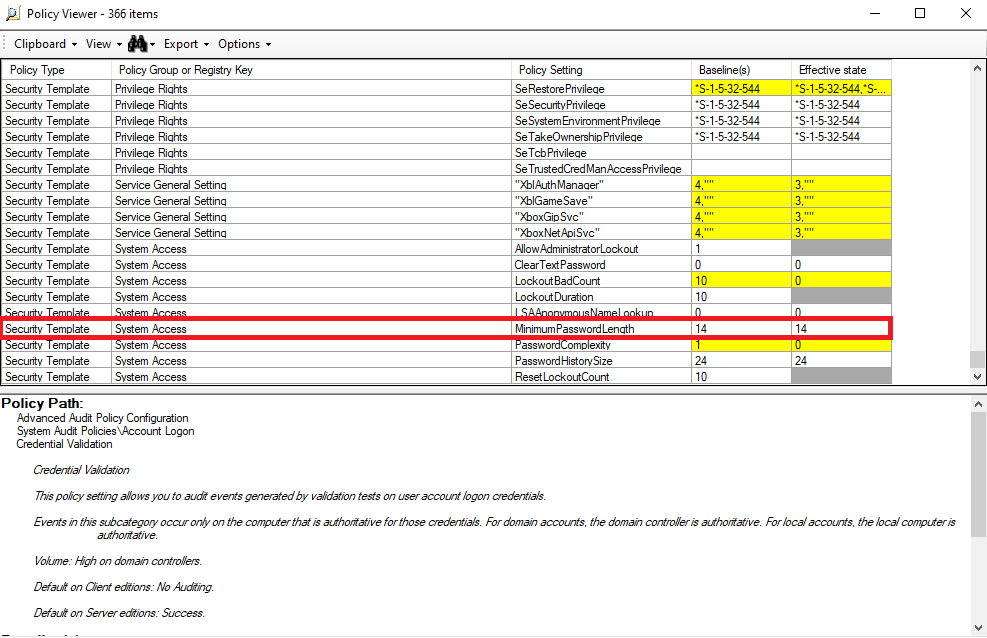
To compare to our new effective state (which includes the changes we just made) we ensure the Microsoft recommended baseline is selected and then use the same button as before to create a new current state.
We go to the same setting and can now see that it meets the baseline recommendations and is no longer highlighted yellow.
And this is how we can ensure our endpoints are using recommended configurations, and also easily identify and trouble shoot issues. Once we have our endpoint configured how we want we can use this as a template for all endpoints.
We also downloaded two other templates at the start of the guide and the method of loading and comparing to the current state is exactly the same. It allows you to configure the endpoint, browser and application level settings to allow us to harden the OS appropriately.
In a future guide we will show how we can import our GPO baseline into the Intune portal to analyse it, compare it to Intune configuration settings, and create an endpoint image we can use from the Intune portal.
