

In part 1 and 2 we looked at creating our enrolment profile and configuration policy, and in this final part we will be creating our compliance policies, tagging devices as corporate owned and finally enrolling an iPad to show the complete onboarding process.
There are two parts to compliance policies in Intune:
- Compliance policy settings – Tenant-wide settings that are like a built-in compliance policy that every device receives. Compliance policy settings set a baseline for how compliance policy works in your Intune environment, including whether devices that haven’t received any device compliance policies are compliant or noncompliant.
- Device compliance policy – Platform-specific rules you configure and deploy to groups of users or devices. These rules define requirements for devices, like minimum operating systems or the use of disk encryption. Devices must meet these rules to be considered compliant.
If you use Conditional Access, your Conditional Access policies can use your device compliance results to block access to resources from noncompliant devices.
There are other actions which can be taken when a device is found to be non-compliant such as sending emails, blocking or retiring devices.
A full list of settings for iOS and iPadOS can be found here.
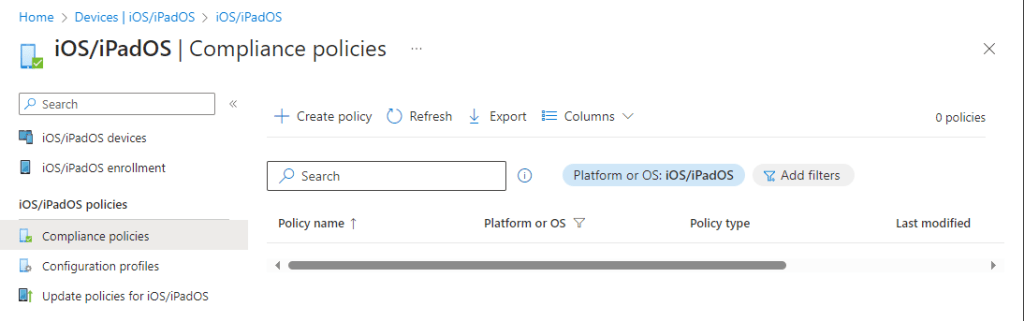
Let’s create our first compliance policy by going to https://intune.microsoft.com > “Devices” > “iOS/iPadOS” > “Compliance Policies” > ” Create policy”.
We give a name and description.

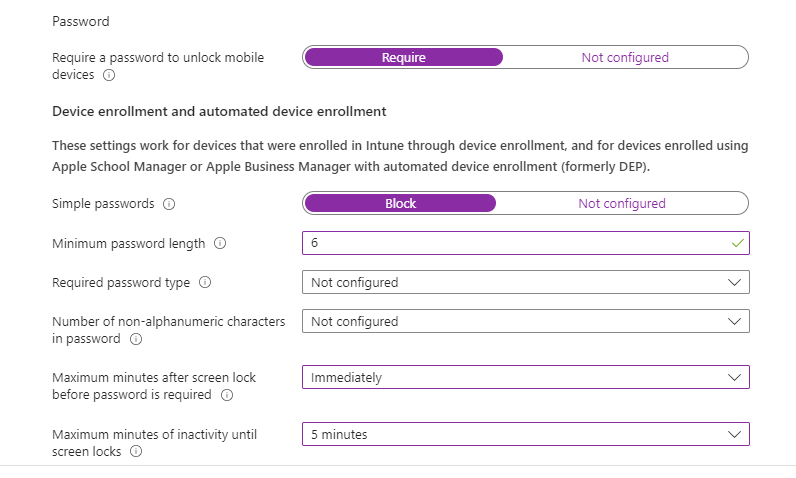
Then we configure the policy as shown, although remember you need to think about the settings within the context of your use-case and organisation. We are using a simple baseline.

Our minimum allowed OS is version 14.0, although we can be more specific if we wish.


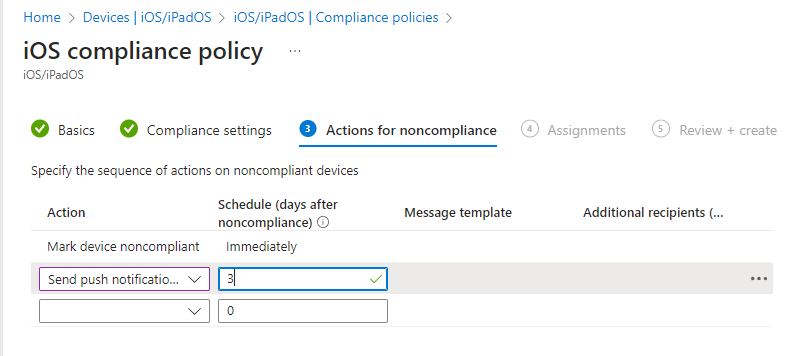
Then we configure the actions for non-compliance, there are lots options but we are going to configure a simple action. We’ll set up a push notification which appears on the deice 3 days after the device falls into non-compliance.
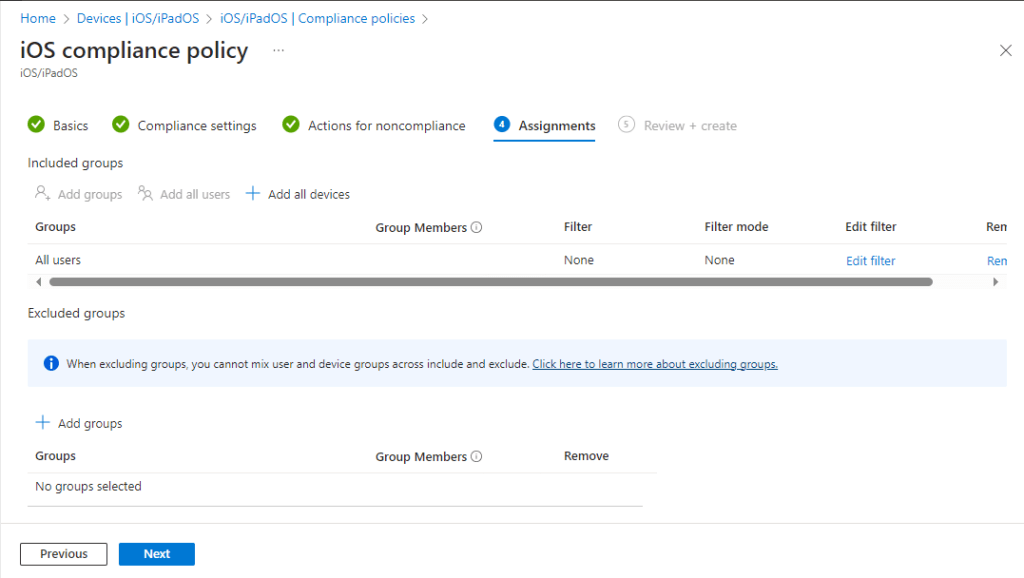
Next we assign the policy to “All Users”, then hit “Next” and then “Create”.
Then we should receive a successful notification.

And our new policy should be visible in our policies screen.

In our compliance policy we have configured the “Microsoft Defender for Endpoint” setting to require that the endpoint is at or under the machine risk score. To ensure this works correctly we need to configure a Mobile Threat Defence Connector (MTDC).
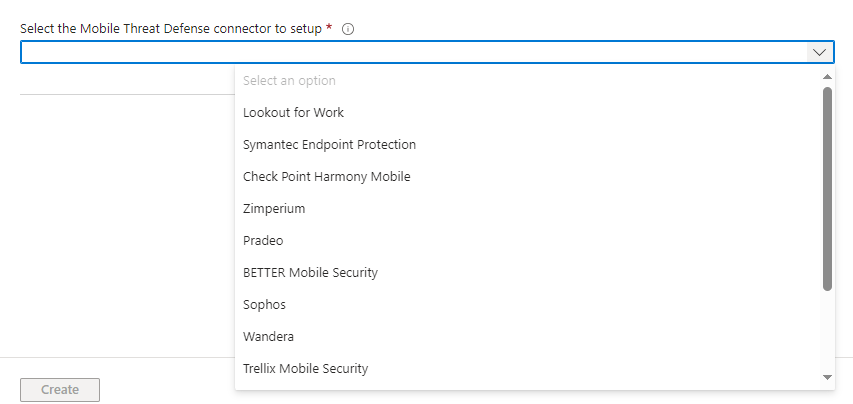
Microsoft supports a number of third party connectors which you can configure by going to https://intune.microsoft.com > “Tenant Administration” > “Connectors and tokens” > “Mobile Threat Defence” as shown below.
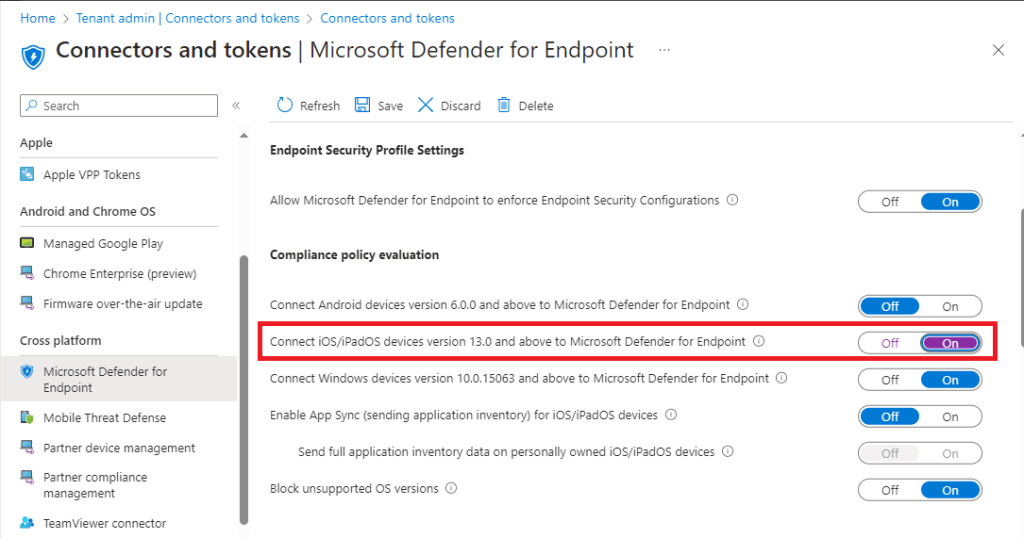
However, as Microsoft Defender for Endpoint (MDE) is included within our licences for existing users we can roll out MDE to our users iOS/iPadOS devices at no extra cost.
Enabling this within Intune is simple, we go to https://intune.microsoft.com > “Tenant Administration” > “Connectors and tokens” > “Microsoft Defender for Endpoint” > and configure the relevant setting to “On” as shown below.
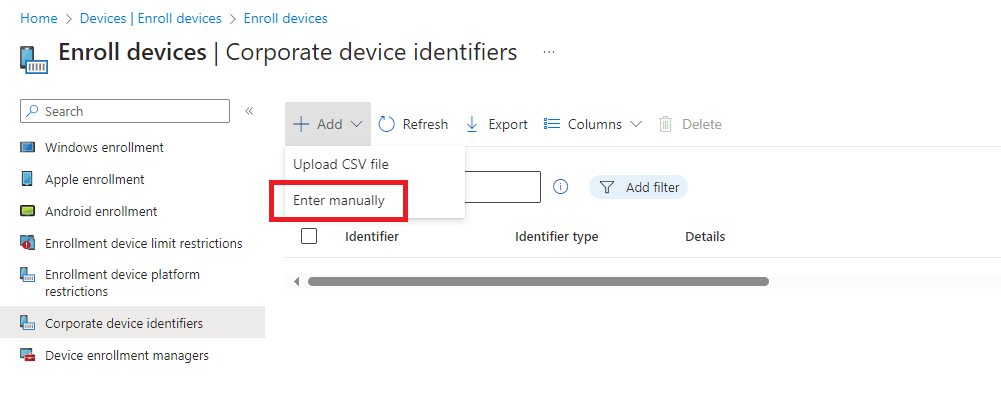
The final part for this guide is to add our corporate identifiers. As previously stated we are not allowing BYOD, so we will label all corporate devices within Intune which will allow us to see if anyone is enrolling personal devices. Although this is a manual process it will mean that any devices which are not labelled will be easy to identify and report on within Intune. (For bulk uploads we can use a csv file). We will then be able to go a step further via conditional access policies which will prevent any non-corporate devices from accessing any company data. To label our known corporate devices we go to https://intune.microsoft.com > “Devices” > “Enrol Devices” > “Corporate Device Identifiers”.

“Add” and for this guide we select “Enter manually”.
You can chose either to use serial number or IMEI number, we’re going to use serial number and provide some further details (we are using the device name). Here we are adding a deice individually but there is functionality which allows the upload of a CSV file.

We now see our newly added device in the same screen.

Now we need to enrol the iPad, so let’s see what that looks like from the end users perspective.
First up we download the Microsoft “Company Portal” app from the official iTunes app store.
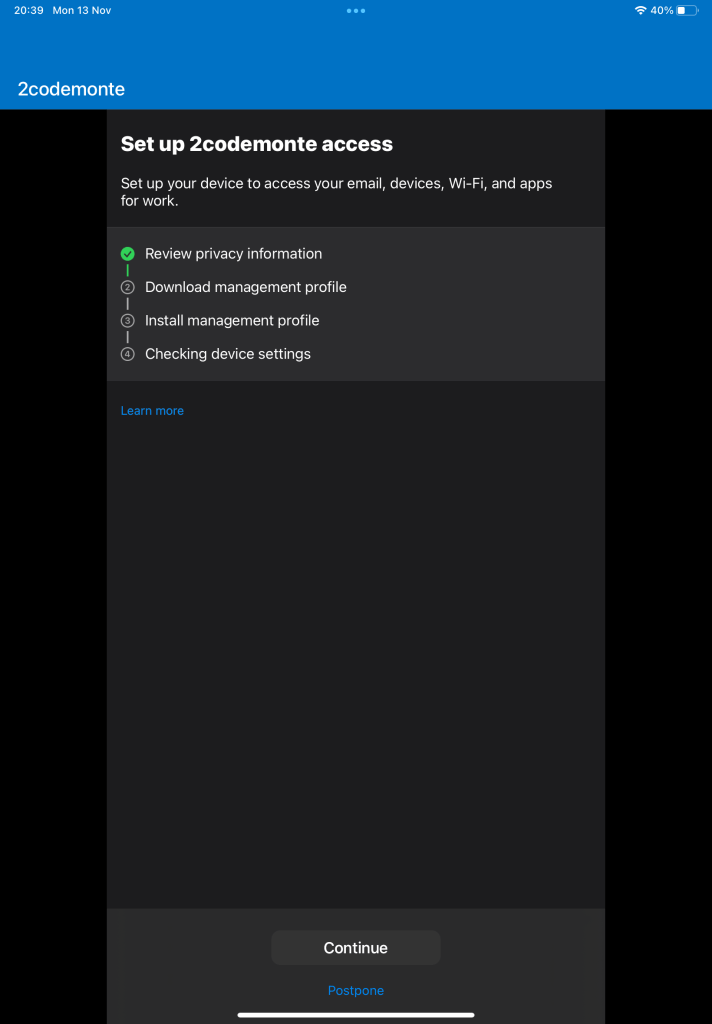
Once downloaded we open the app and login with our standard users credentials and complete our MFA. We then get presented with the below screen. We review the provided privacy information.
The next step is to download the configuration file, here we hit “Allow”.

Once the download is complete, we need the end user to perform some additional manual steps, (This is the advantage of using Apple configuration tools as they make the onboarding process seamless or zero-touch) so you will need to account for the additional resource required to assist end users where required.

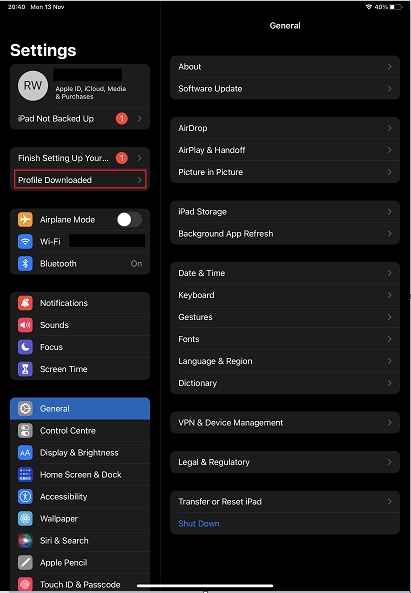
We head over to settings and select “Profile Download”.
We are asked if we wish to allow the profile to install, we do, so we select “Install”.
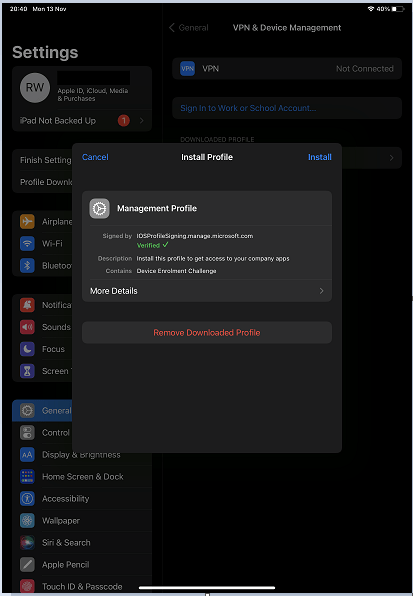
We will then be required to enter our passcode to approve the install.

We are warned about the root certificate that will also be installed as part of the configuration package. We need to select “Install” again.

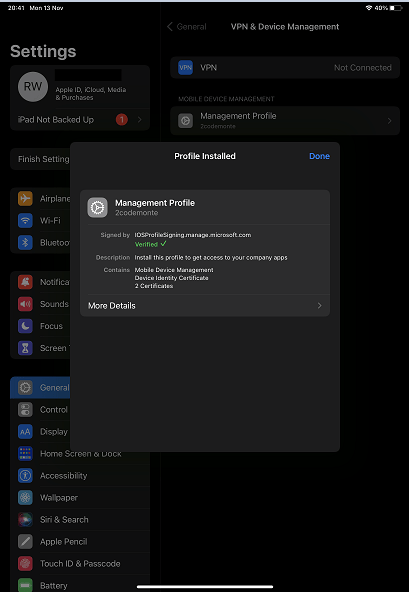
Once we have received the successful message we can head back over to the Company Portal app and complete the setup process.
The next stage is for the device to be checked against our configuration and compliance profiles.

That’s it, we’re all done.

We head over to our Intune portal and can now see the iPad in our devices list, and can also see that it is compliant.

That’s it for this guide, in future guides we will be looking at configuring apps within the company portal, and how this works with conditional access to further improve our security posture.
