

To be honest this guide could sit in our securing Azure series under Identity Access Management, however as this is specifically for controlling Local Administrative accounts, and the policies sit within Intune, it does sit better within our Intune series.
What is LAPS?
Windows LAPS is a feature that allows us to manage and back up the password for the local administrator account on most modern Microsoft OS versions since April 2023 including Windows 10, 11, and Server versions 2019 and 2022. LAPS will set a different administrators password on each endpoint and regularly rotate the password to protect against attacks such as pass the hash, and lateral movement, while also providing us with a method to enforce Role Based Access Control (RBAC) access to local administrators passwords, and more secure support desk activities where local admin is required.
Passwords can be backed up to to both Entra ID, and Active Directory so can support on-premises, and cloud based infrastructures.
As with all our guides, our infrastructure is full cloud and will show how to configure LAPS using Intune, and backup passwords to AAD only.
Enable LAPS Within the Azure Portal.
As we will be managing the local administrators password within Intune, we also want to enable the account via Intune.
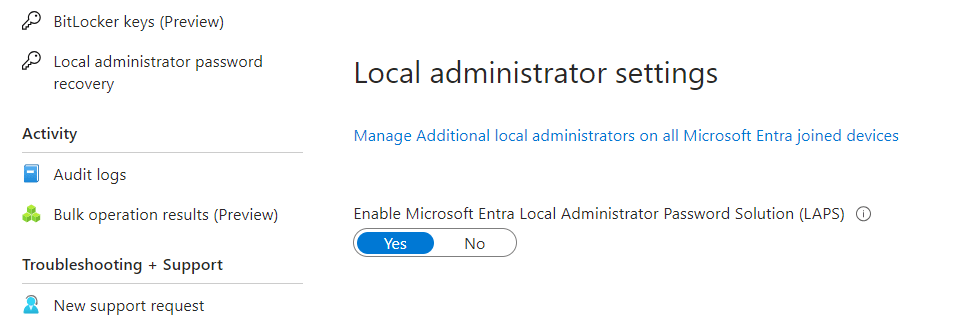
First step is to enable LAPS within the Azure portal at https://portal.azure.com and from the Home page we select Entra ID > Devices > Device Settings > then we enable the LAPS setting as shown below, and save our changes.
We are going cover two different methods to configure LAPS, however both require the above step, so whether you use method 1 or 2 you will need to enable the above setting.
Configuration Method 1
We go to the Intune portal at https://intune.microsoft.com/ > Devices > Windows Devices > Configuration Profiles.

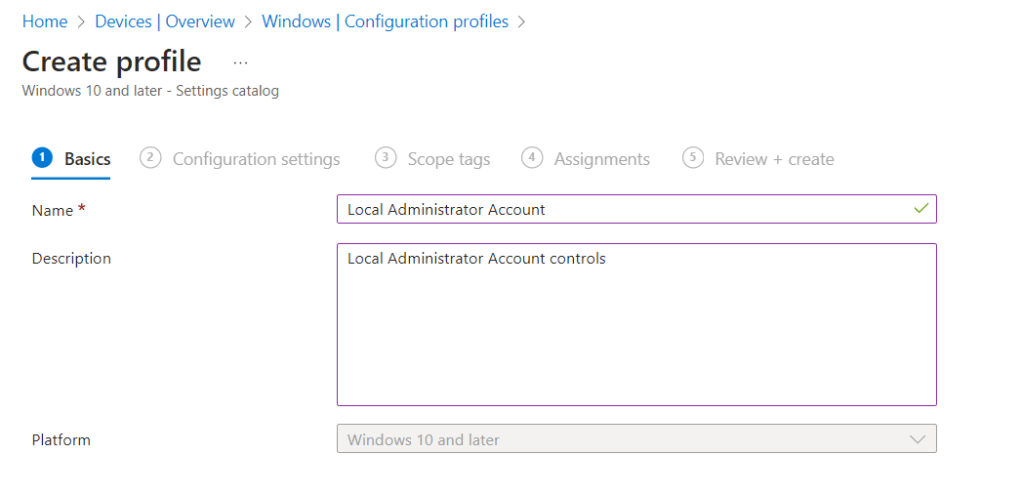
Select “Create” and create a new policy, select “Windows 10 and above”, and “Settings Catalogue”, “Create”.

We provide a name and description.
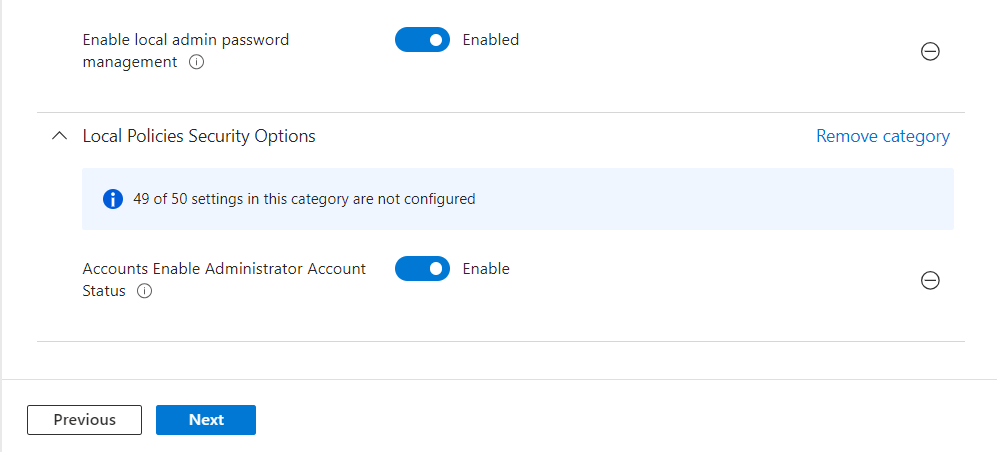
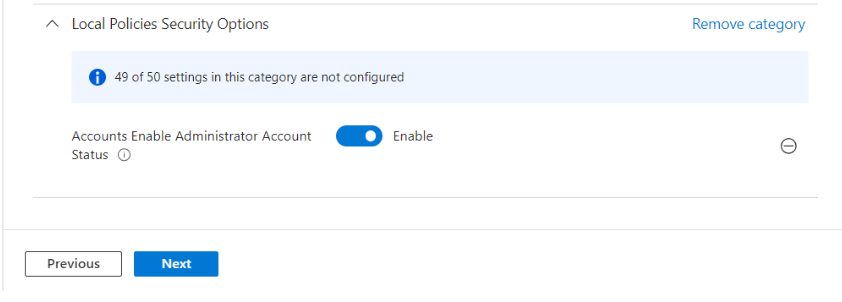
Search for “Local Policies Security Options” and then select the correct option and tick the setting as shown from the list “Accounts Enable Administrator Account Status”.

NOTE: If you do not rename the local administrator account during your chosen deployment method then you must also enable “Accounts Rename Administrator Account”. This allows you to rename the local administrator account which should not be left with the default name.
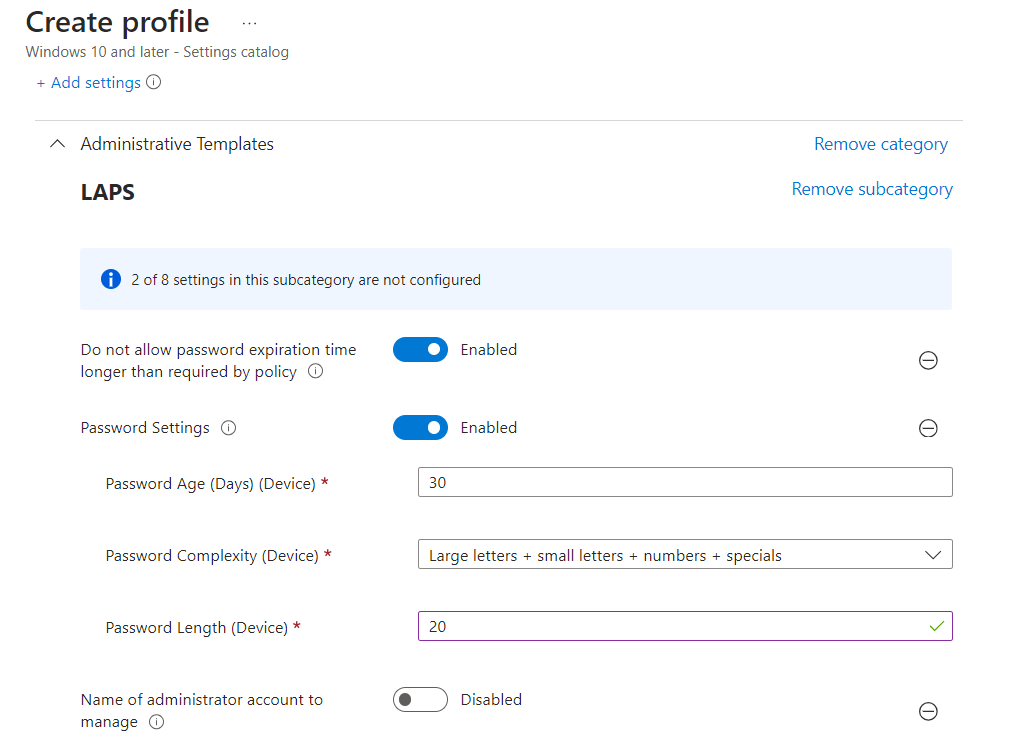
Next we search for “LAPS”, select the relevant option under administrative templates and then use the “Select all these settings” button to auto tick all the boxes to enable the settings..

NOTE: Only enable “Name of administrator account to enable” if you are intending to manage an account which is NOT the built-in administrator account. Even if you have renamed the built-in admin account it will be identified by its GUID and so this setting is not required.
Now we have enabled the settings we leave this Window and configure the enabled settings as shown below.
Hit next and configure your scope tags if you use them, then move onto the next page where we assign the .configuration policy to a device or group.

The last page allows us to review and save our configuration policy and that’s it, we have now configured LAPS. Now we wait until the selected devices check in with Intune and monitor whether the policy is working as expected. Login to your test device and confirm the account is enabled, and that you can login with the password provided within the Intune device details page.
Configuration Method 2
We can also use Endpoint Security configuration profiles to configure LAPS rather than using the administrative templates as in method 1. To do this follow the below steps.
We go to the Intune portal at https://intune.microsoft.com/ > Devices > Windows Devices > Configuration Profiles.
Select “Create” and create a new policy, select “Windows 10 and above”, and “Settings Catalogue”, “Create”.
We provide a name and description.
Search for “Local Policies Security Options” and then select the correct option and tick the setting as shown from the list “Accounts Enable Administrator Account Status”.
Close this side menu and enable the setting as shown below.
NOTE: If you are not renaming the local administrator account during your chosen endpoint deployment method (Auto Pilot or Automatic enrolment within Intune for example) then you should also enable “Accounts Rename Administrator Account”. This allows you to rename the local administrator account which should not be left with the default name.
Hit next and configure your scope tags if you use them, then move onto the next page where we assign the configuration policy to a device or group.
The last page allows us to review and save our configuration. That’s the first part completed, now we head over to configure a LAPS policy.
Staying within the Intune portal we go to “Endpoint Security” > “Account Protection” > and select “Create Policy”.

We give it a name and description and move onto configuring the available settings as below.

After hitting next we assign scope tags if we use them, then move to assigning the policy to a device group.

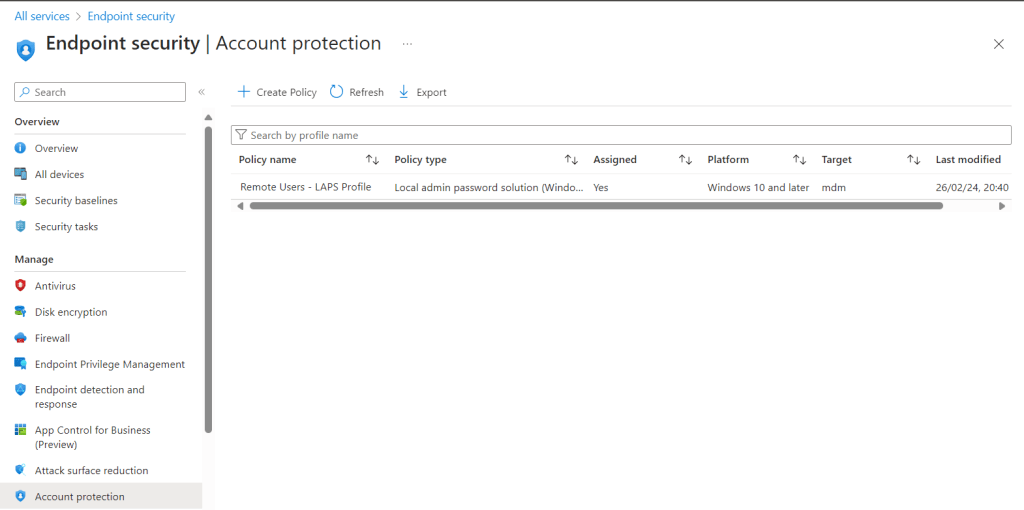
We move to the last page where we can review and save our configuration. Below we see the creation of our new Endpoint Security Policy.
To view and use the LAPS password for a specific device.
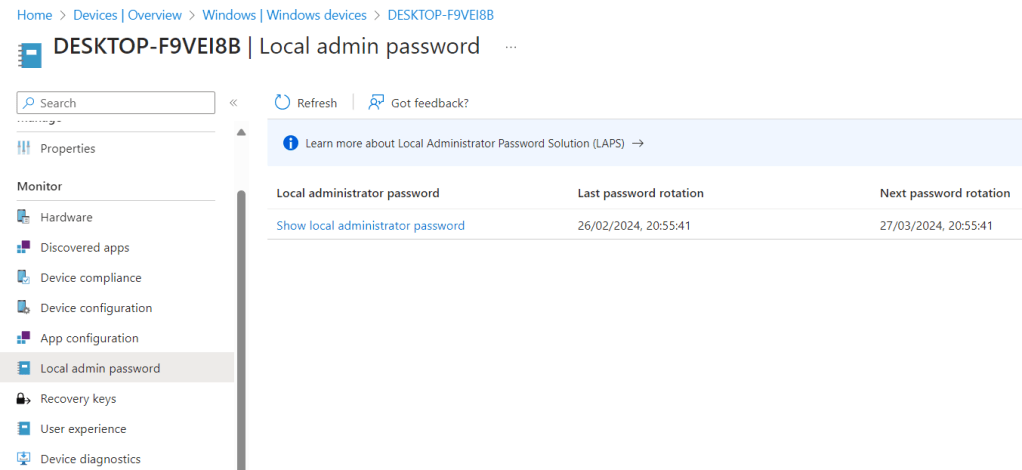
Once either of these methods are configured and the policy has applied we can go to any device which falls under the policy and access the password which has been been created for the local administrators account on that device.
As shown in the screenshot below, we select the device and go to the Local admin password option. By clicking the displayed link we can reveal and copy the local admin password.
We hope you found this informative, we will come back to LAPS in a future guide.
